> ## Documentation Index
> Fetch the complete documentation index at: https://fyre.bot/llms.txt
> Use this file to discover all available pages before exploring further.
# Proxy Guide
> Learn how to configure privileged intent proxying for your server.
Privileged intent proxying isn't available yet, as Fyre still has the Message Content intent for a short while more.
An announcement will be posted when intent proxying is required.
## Why?
Unfortunately, Discord has repeatedly denied our applications for the
[Message Content privileged intent](https://docs.discord.com/developers/events/gateway#message-content-intent).
Many of Fyre's features require the Message Content intent to function.
Without the intent, Fyre doesn't have the required message data to provide these features.
#### Affected Features
The following features require the Message Content intent, and won't fully work without some form of proxying:
* [Text Commands](../syntax)
* [Ticket Transcripts](../modules/tickets/general)
* [Message sniping](../modules/snipe)
* [Channel media mode](../modules/media)
* [VIP auto responses (custom triggers only)](../modules/vip)
* [Automatic time conversion](../modules/time)
* [Server auto responses](../modules/responses)
## How it Works
Privileged intent proxying uses custom bots to forward specific gateway events to Fyre,
allowing servers to continue using features that rely on the Message Content intent (see above).
## Requirements
Fyre has 2 modes available for privileged intent proxying.
Each of these modes has it's own requirements.
#### Partnered Apps
If you have one of our partnered bots in your server, you can use it for proxying for free, regardless of your server's size.
Available partnered apps will be listed when using `/config proxy` in your server.
Please check the partnered app list before subscribing to Custom App Proxying, as you might not need it.
#### Custom App
By default, all Discord apps (bots) can access Message Content when they have less than 10,000 total users.
Your app's user count is the total members of each server on your bot combined.
If your server has less then 10,000 members, you can use the custom bot proxying mode.
If your server has more then 10,000 members, you **cannot** use custom bot proxying,
unless your app is approved for the Message Content privileged intent.
## Configuring
To configure privileged intent proxying in your server, use `/config proxy`.
If you select the "Custom App" mode, you'll need to provide your bot's token in the command.
If you have any of our partnered apps in your server, you'll see them listed as options with the "(Partner)" label.
If you select a partnered app, you don't need to do anything else.
#### Custom App Setup Instructions
Follow these instructions to use a custom bot for privileged intent proxying.
In your browser of choice, visit [https://discord.com/developers/applications](https://discord.com/developers/applications).
Once there, make sure you're logged into your Discord account.
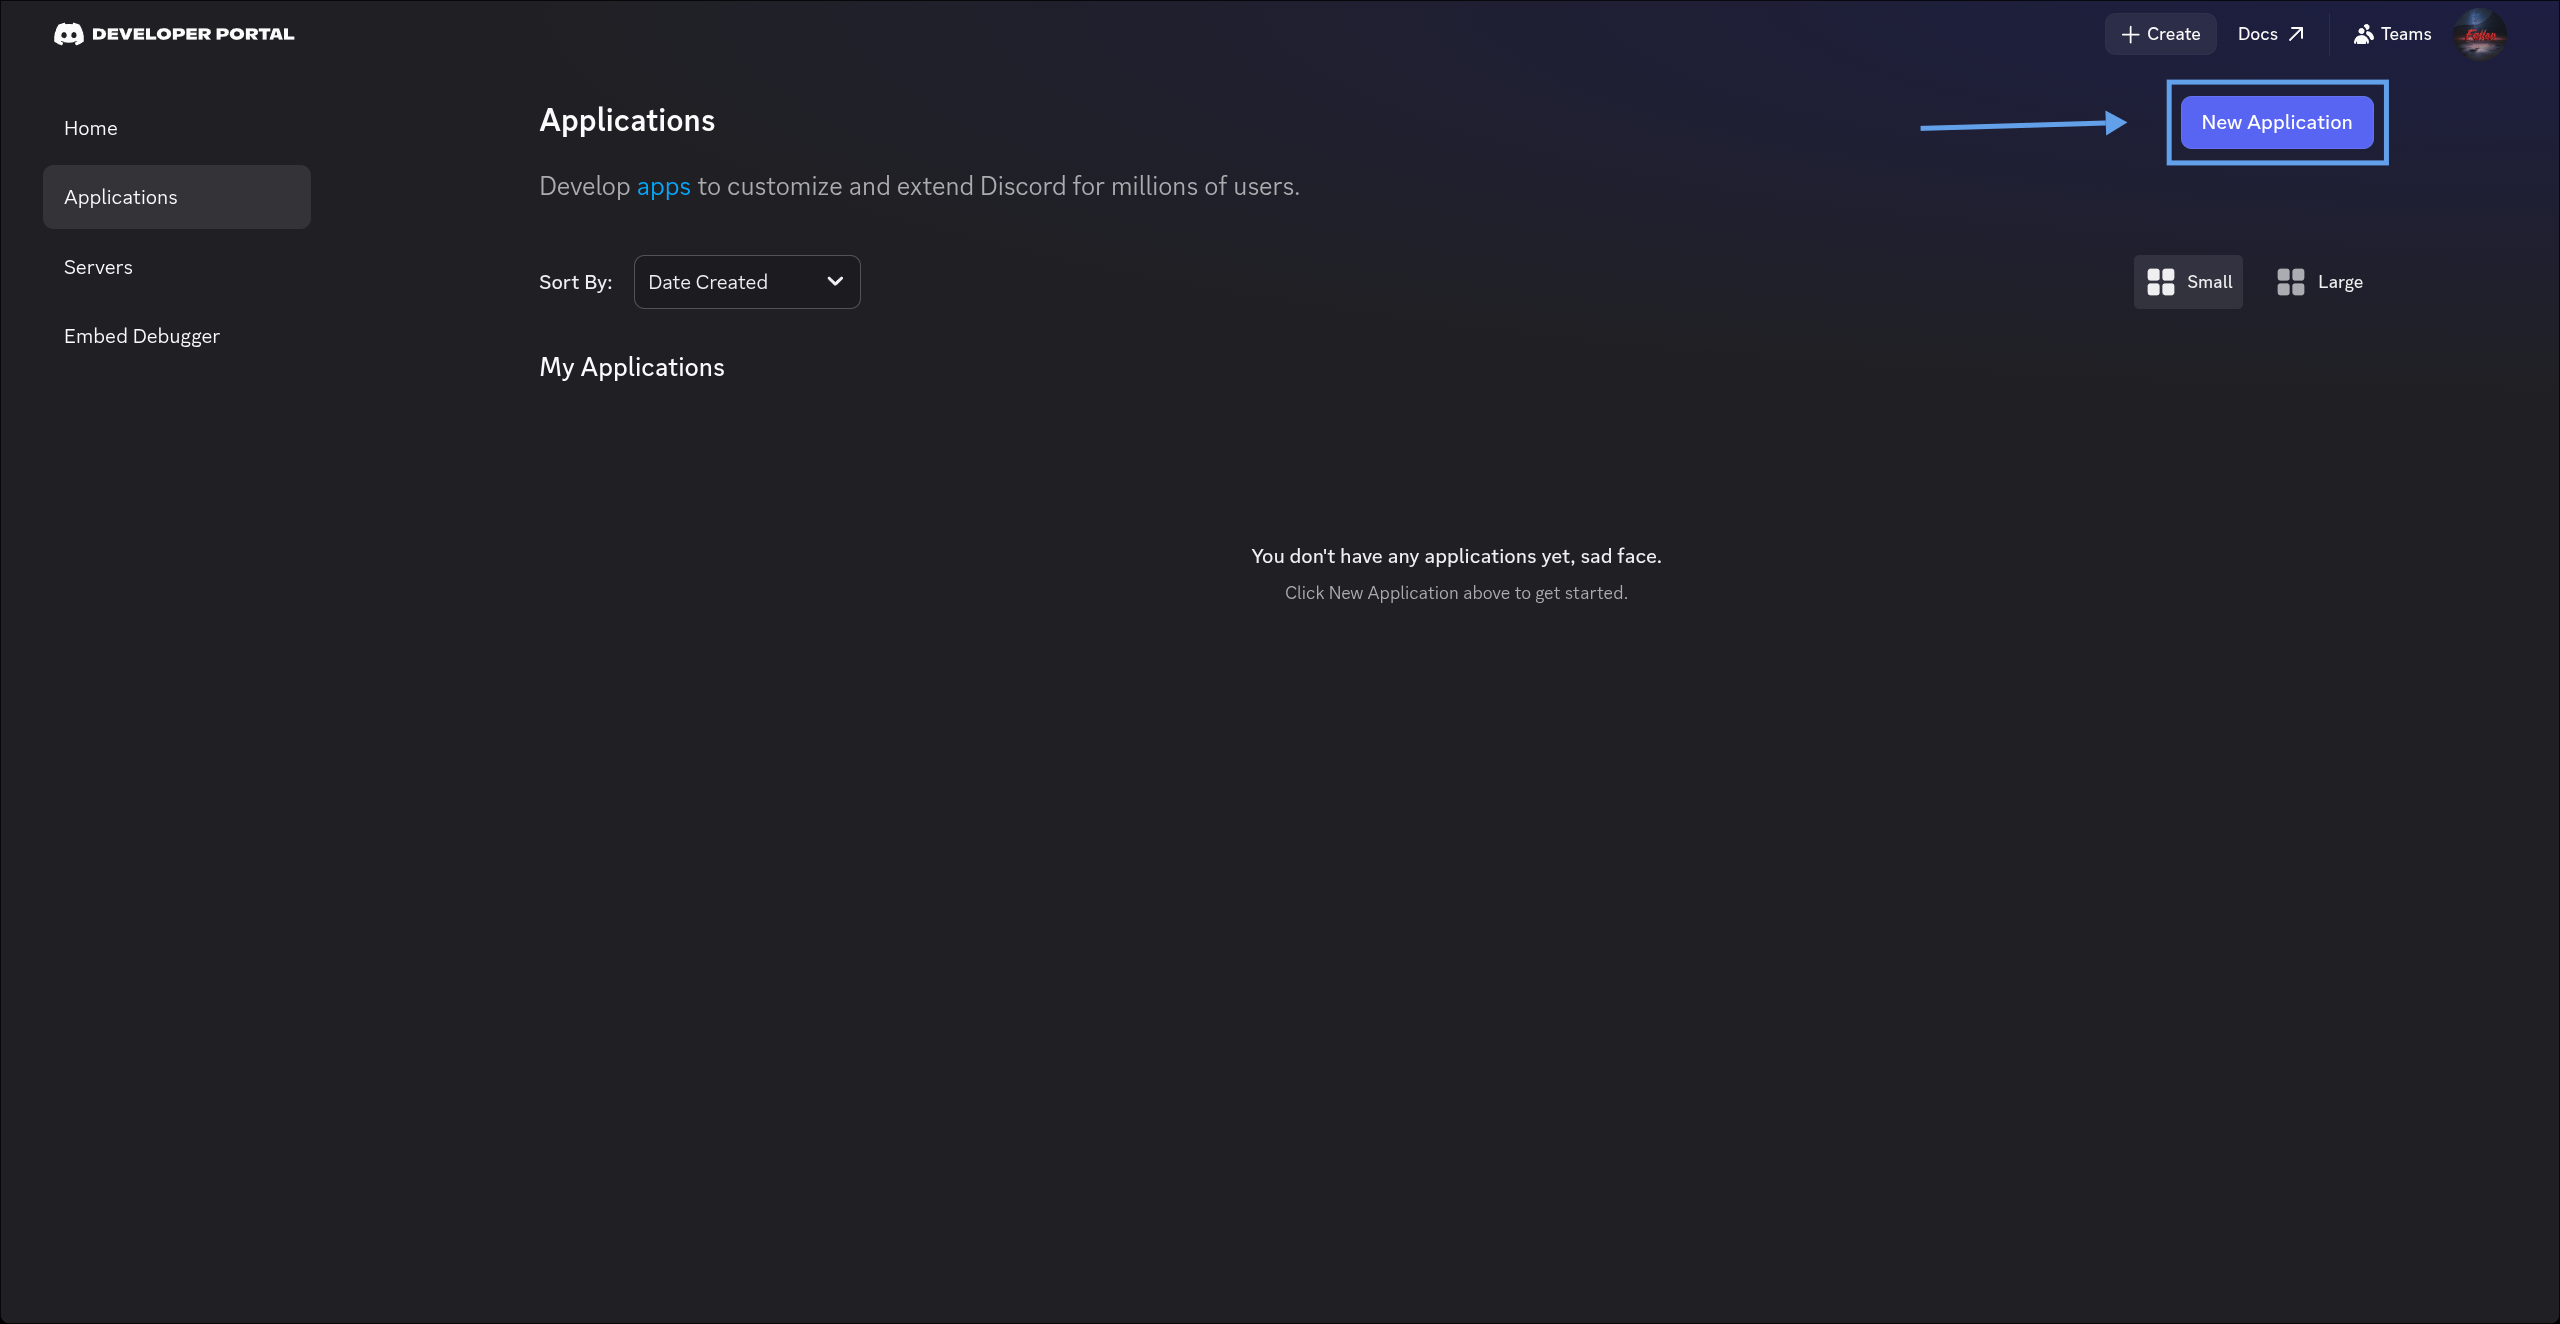
In the top right of the page, tap/click the "New Application" button.
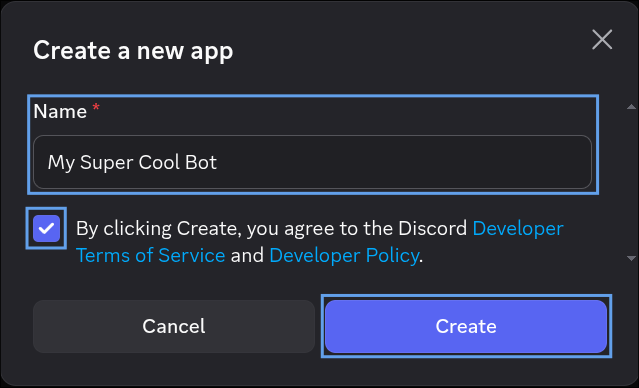
 Next, enter a name for your new app, and leave the selected team as "Personal" if shown.
Then, tap/click the box to agree to the Developer Terms & Policies.
And finally, tap/click "Create" in the bottom left.
Next, enter a name for your new app, and leave the selected team as "Personal" if shown.
Then, tap/click the box to agree to the Developer Terms & Policies.
And finally, tap/click "Create" in the bottom left.
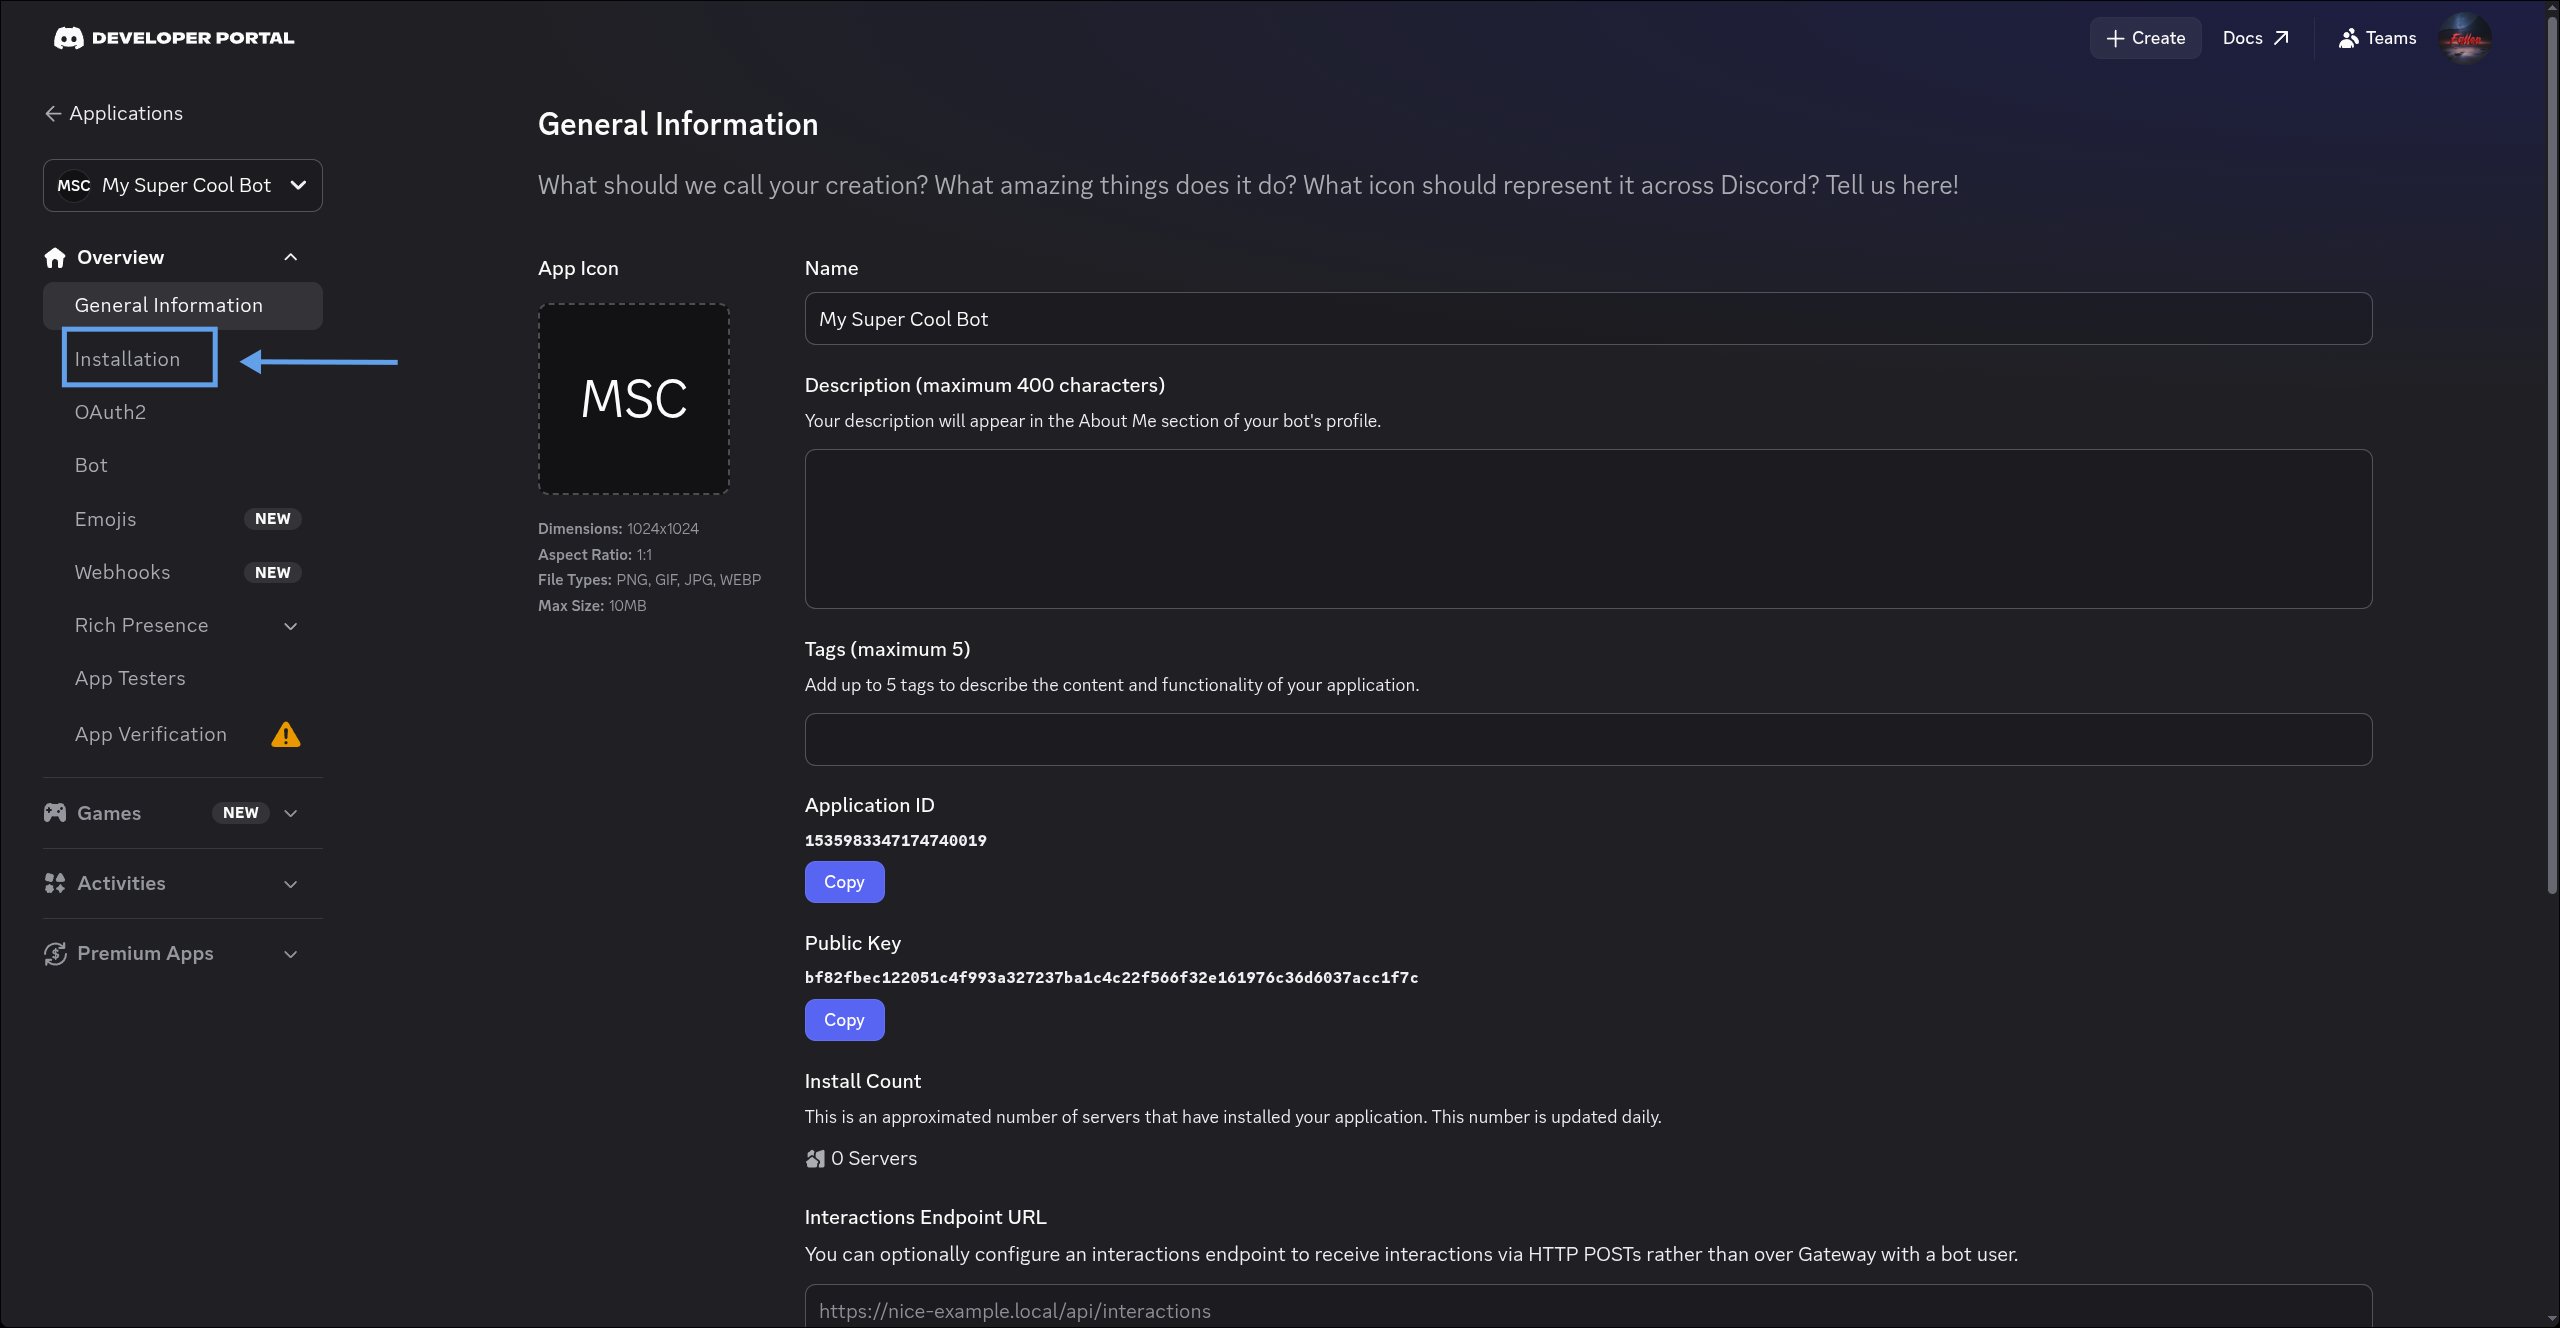
 Select the "Installation" page on the sidebar to switch to the installation settings page.
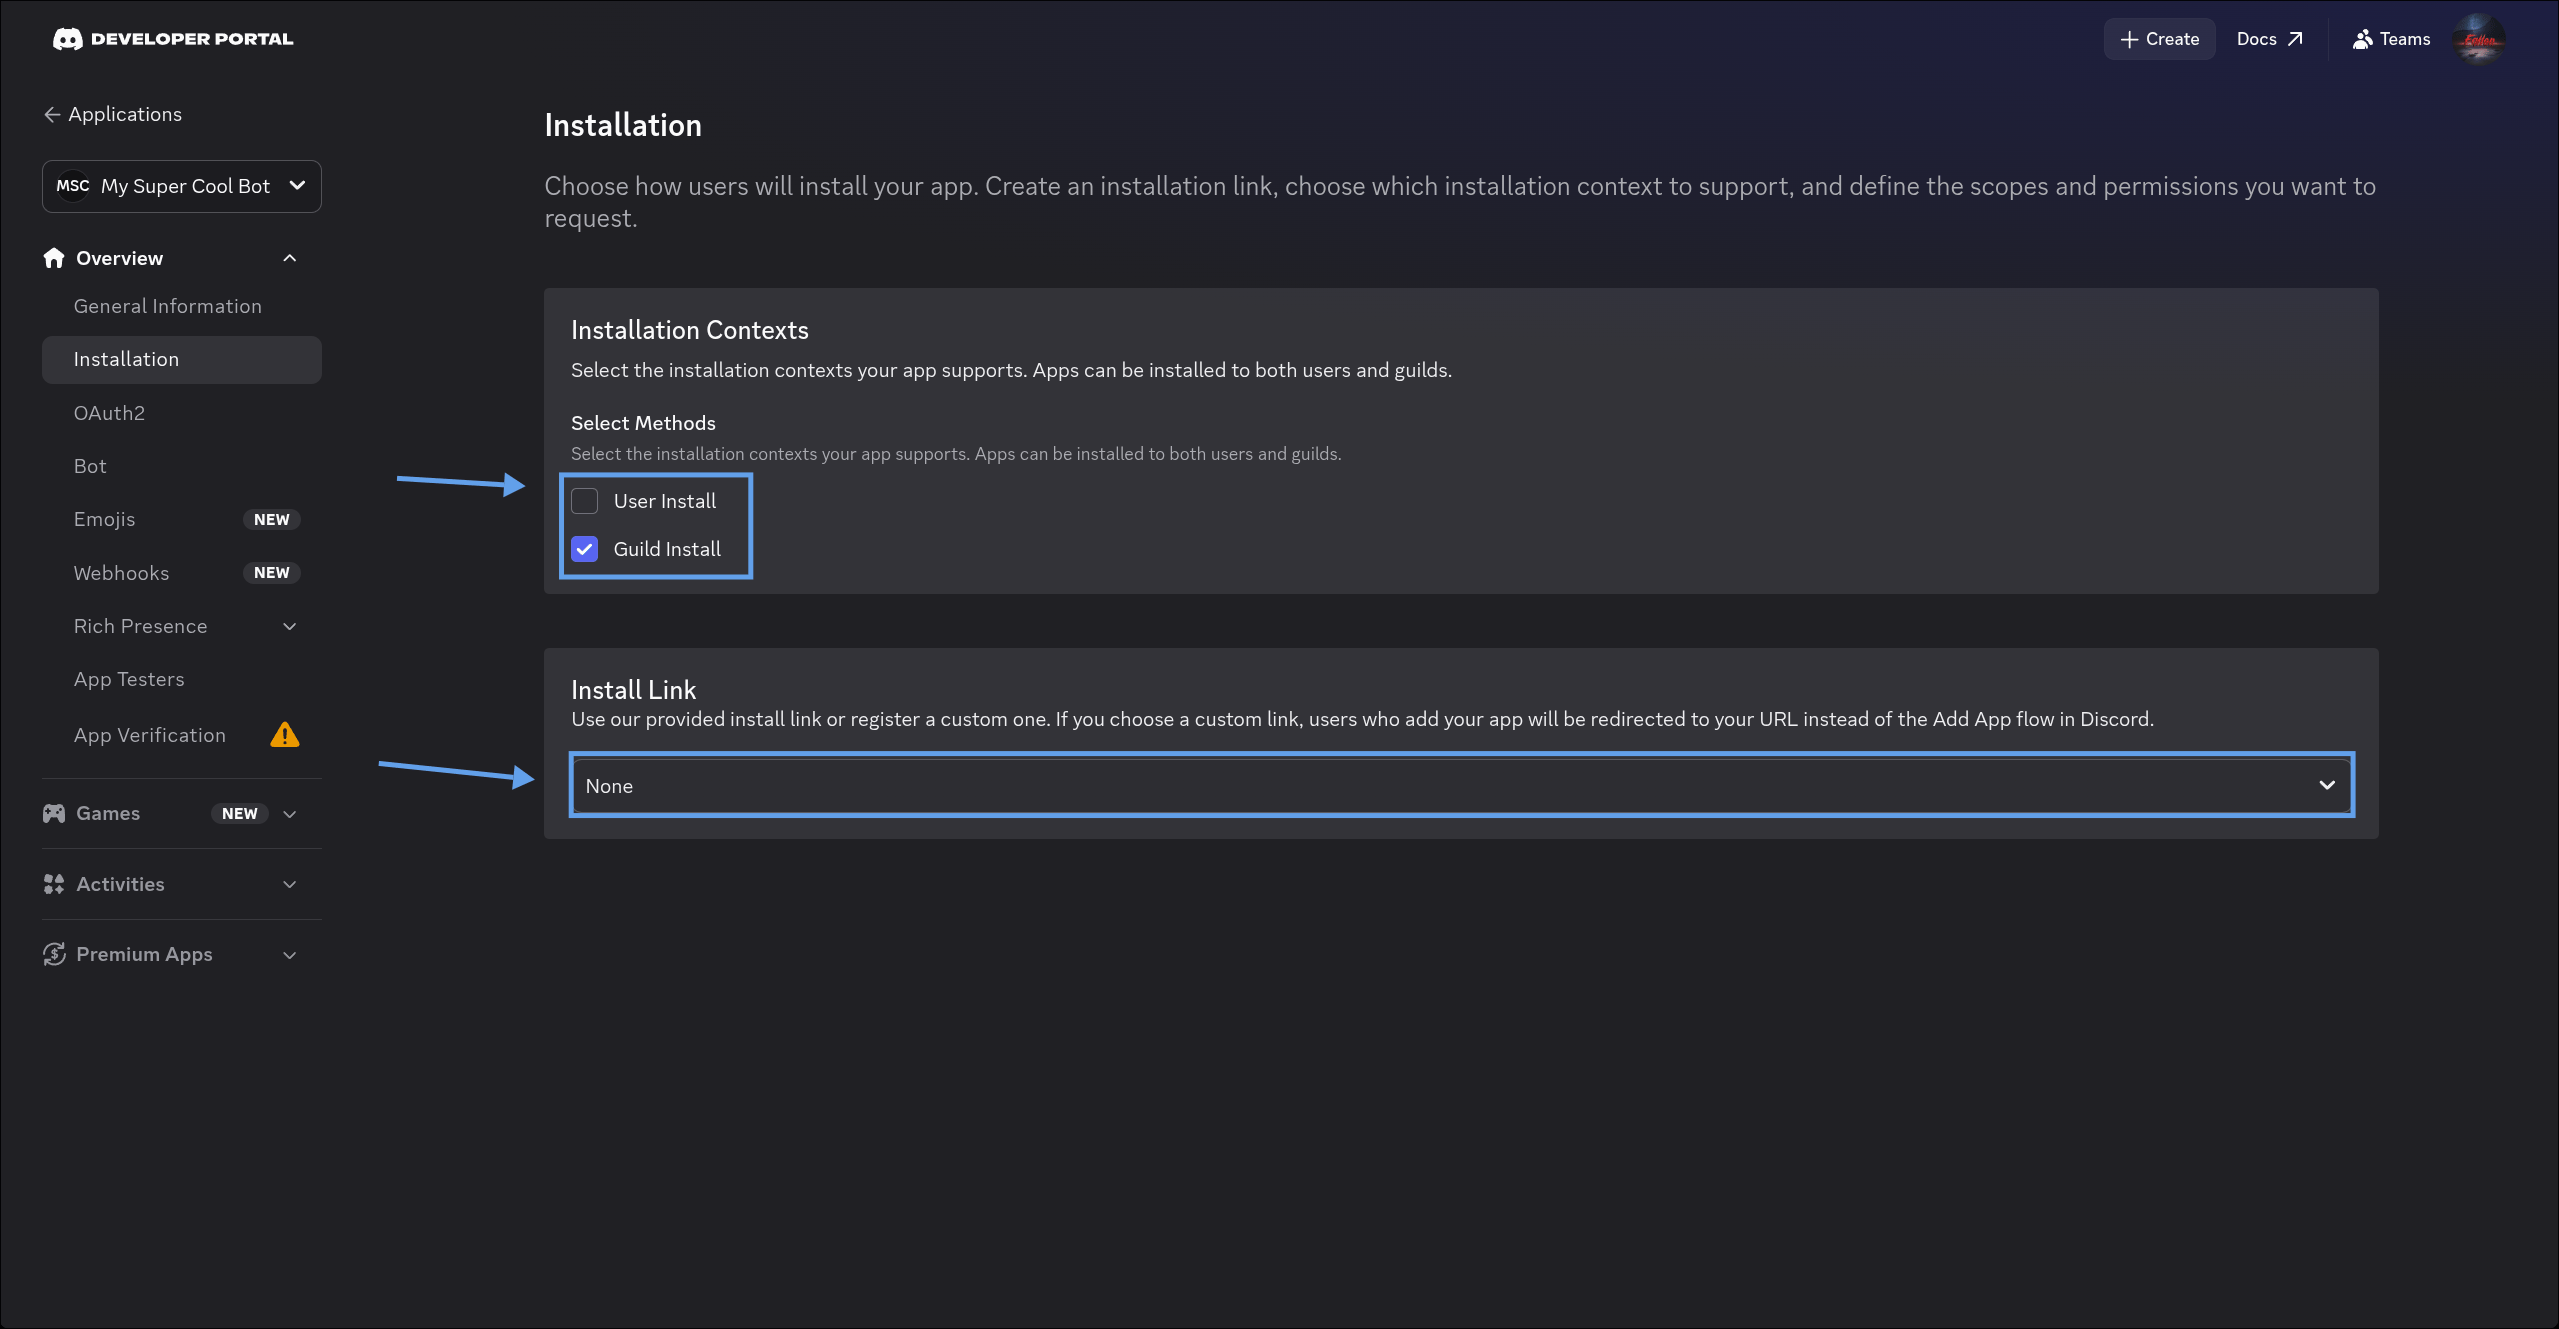
 Under "Installation Contexts", deselect "User Install", then select "None" in the "Install Link" select menu.
 Tap/click "Save Changes" at the bottom of the page after making changes.
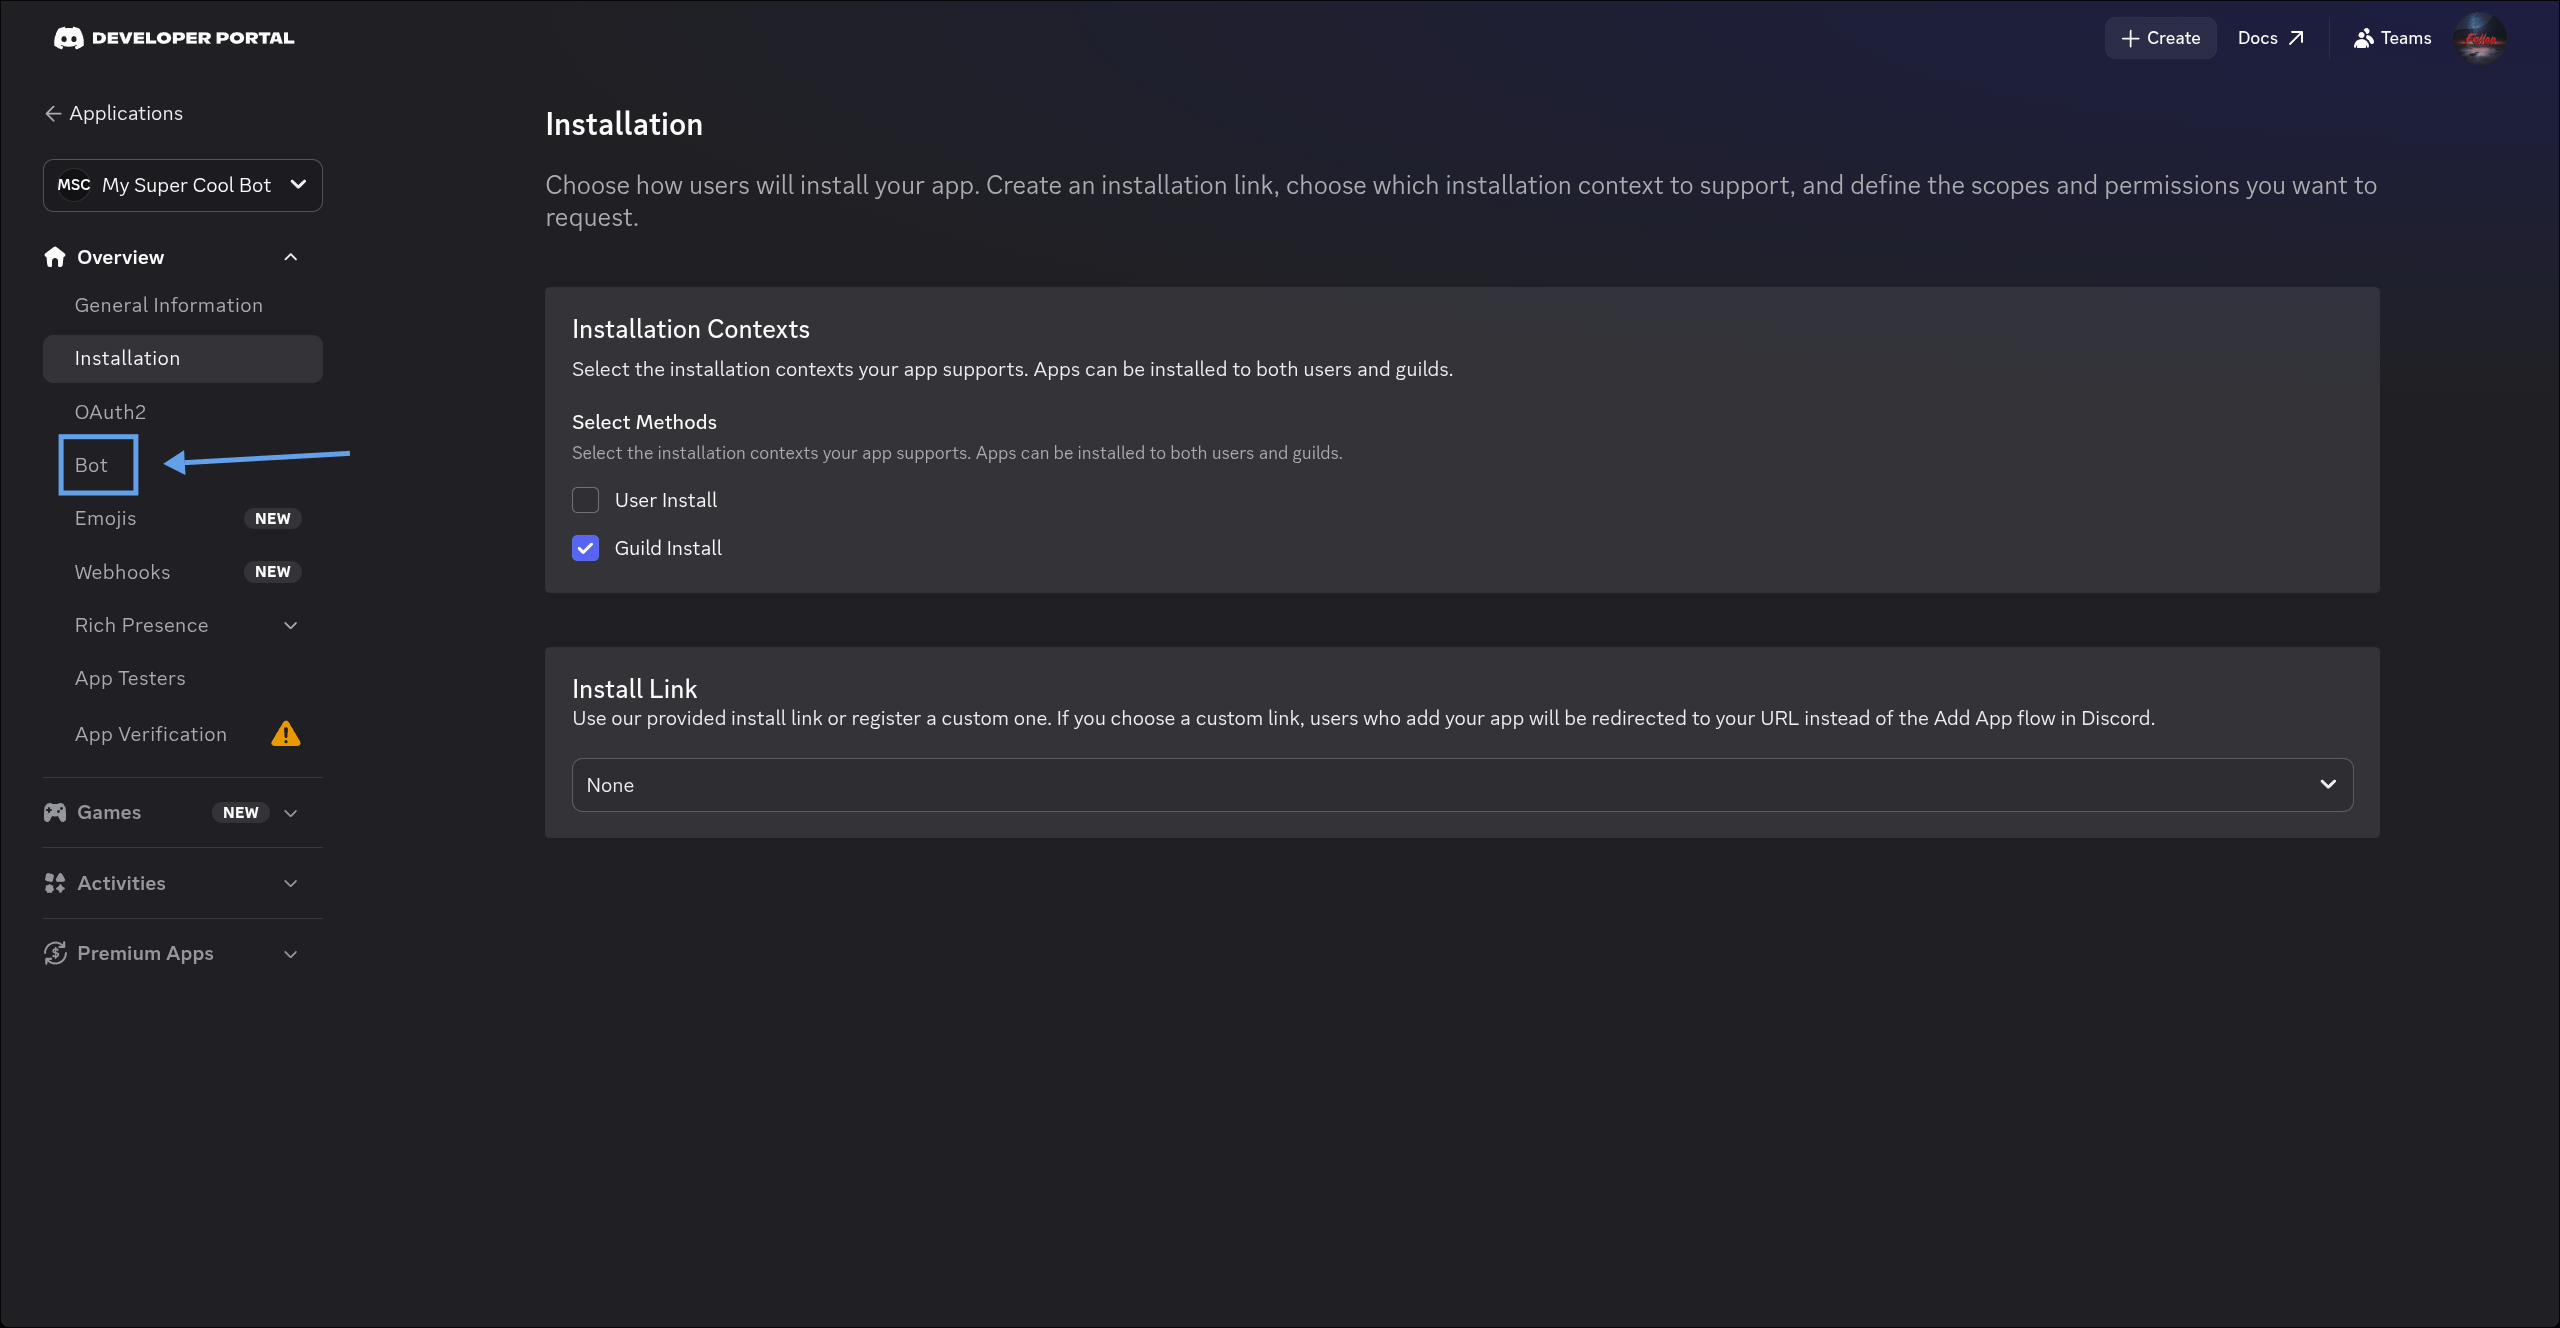
Select the "Bot" page on the sidebar to switch to the bot settings page.
Tap/click "Save Changes" at the bottom of the page after making changes.
Select the "Bot" page on the sidebar to switch to the bot settings page.
 Toggle off "Public Bot", then scroll down and toggle on "Message Content Intent".
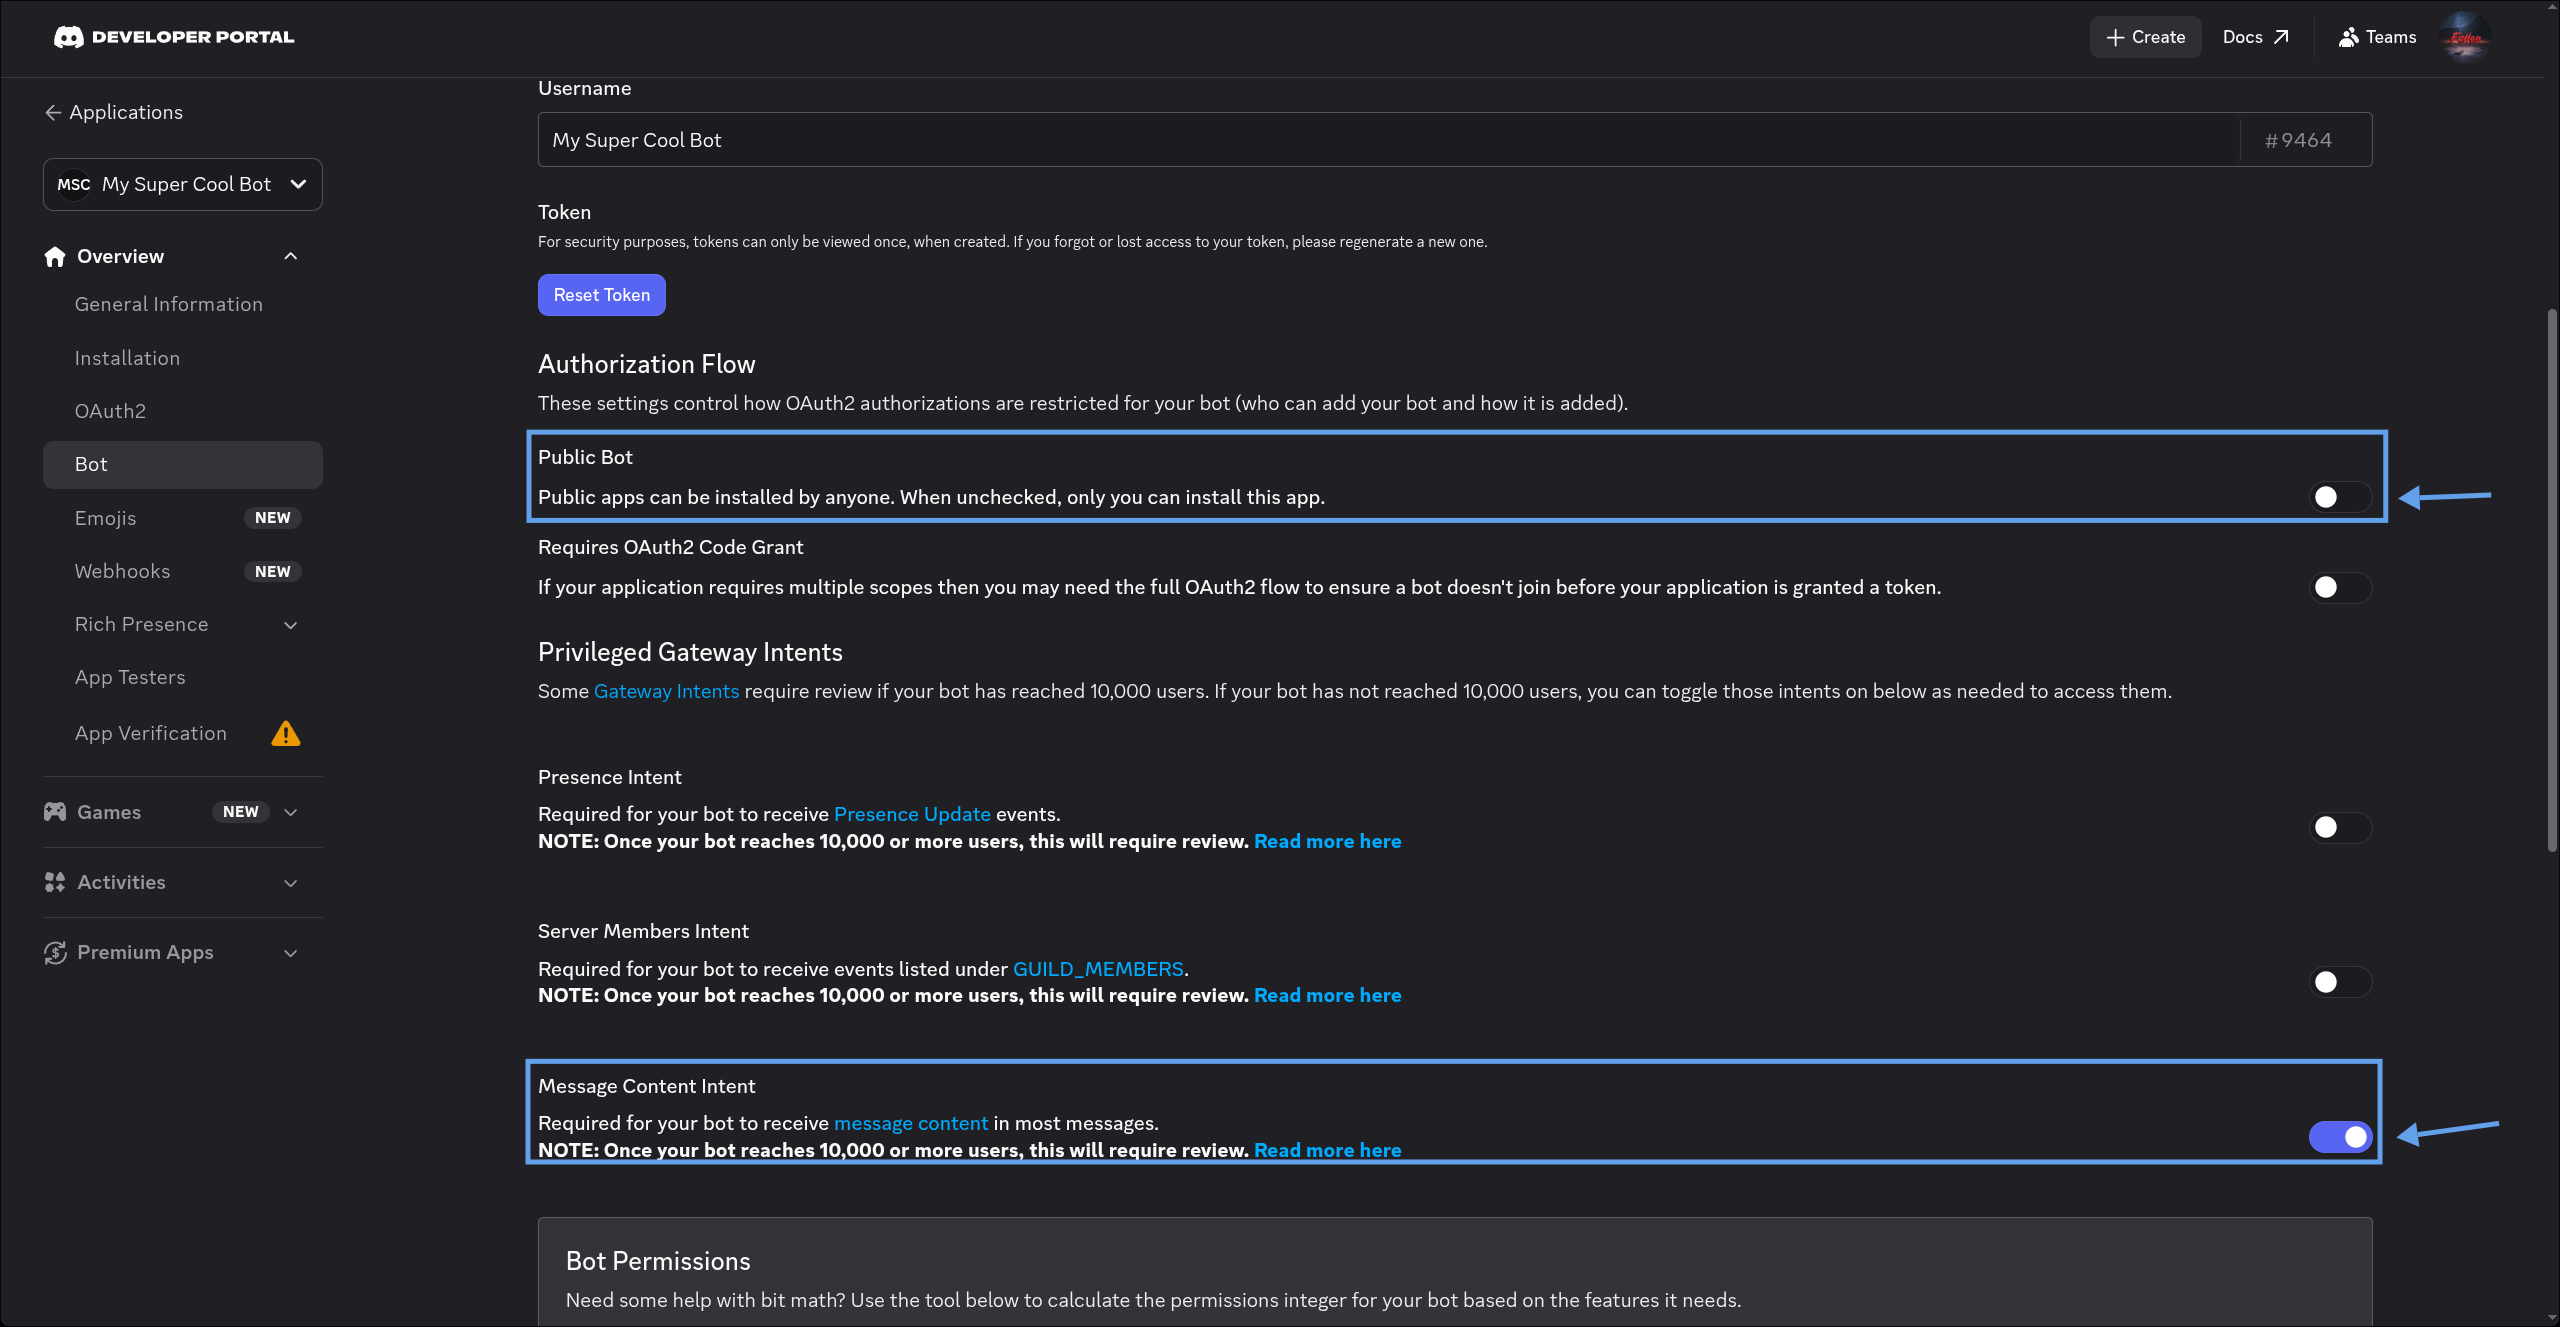 Tap/click "Save Changes" at the bottom of the page after making changes.
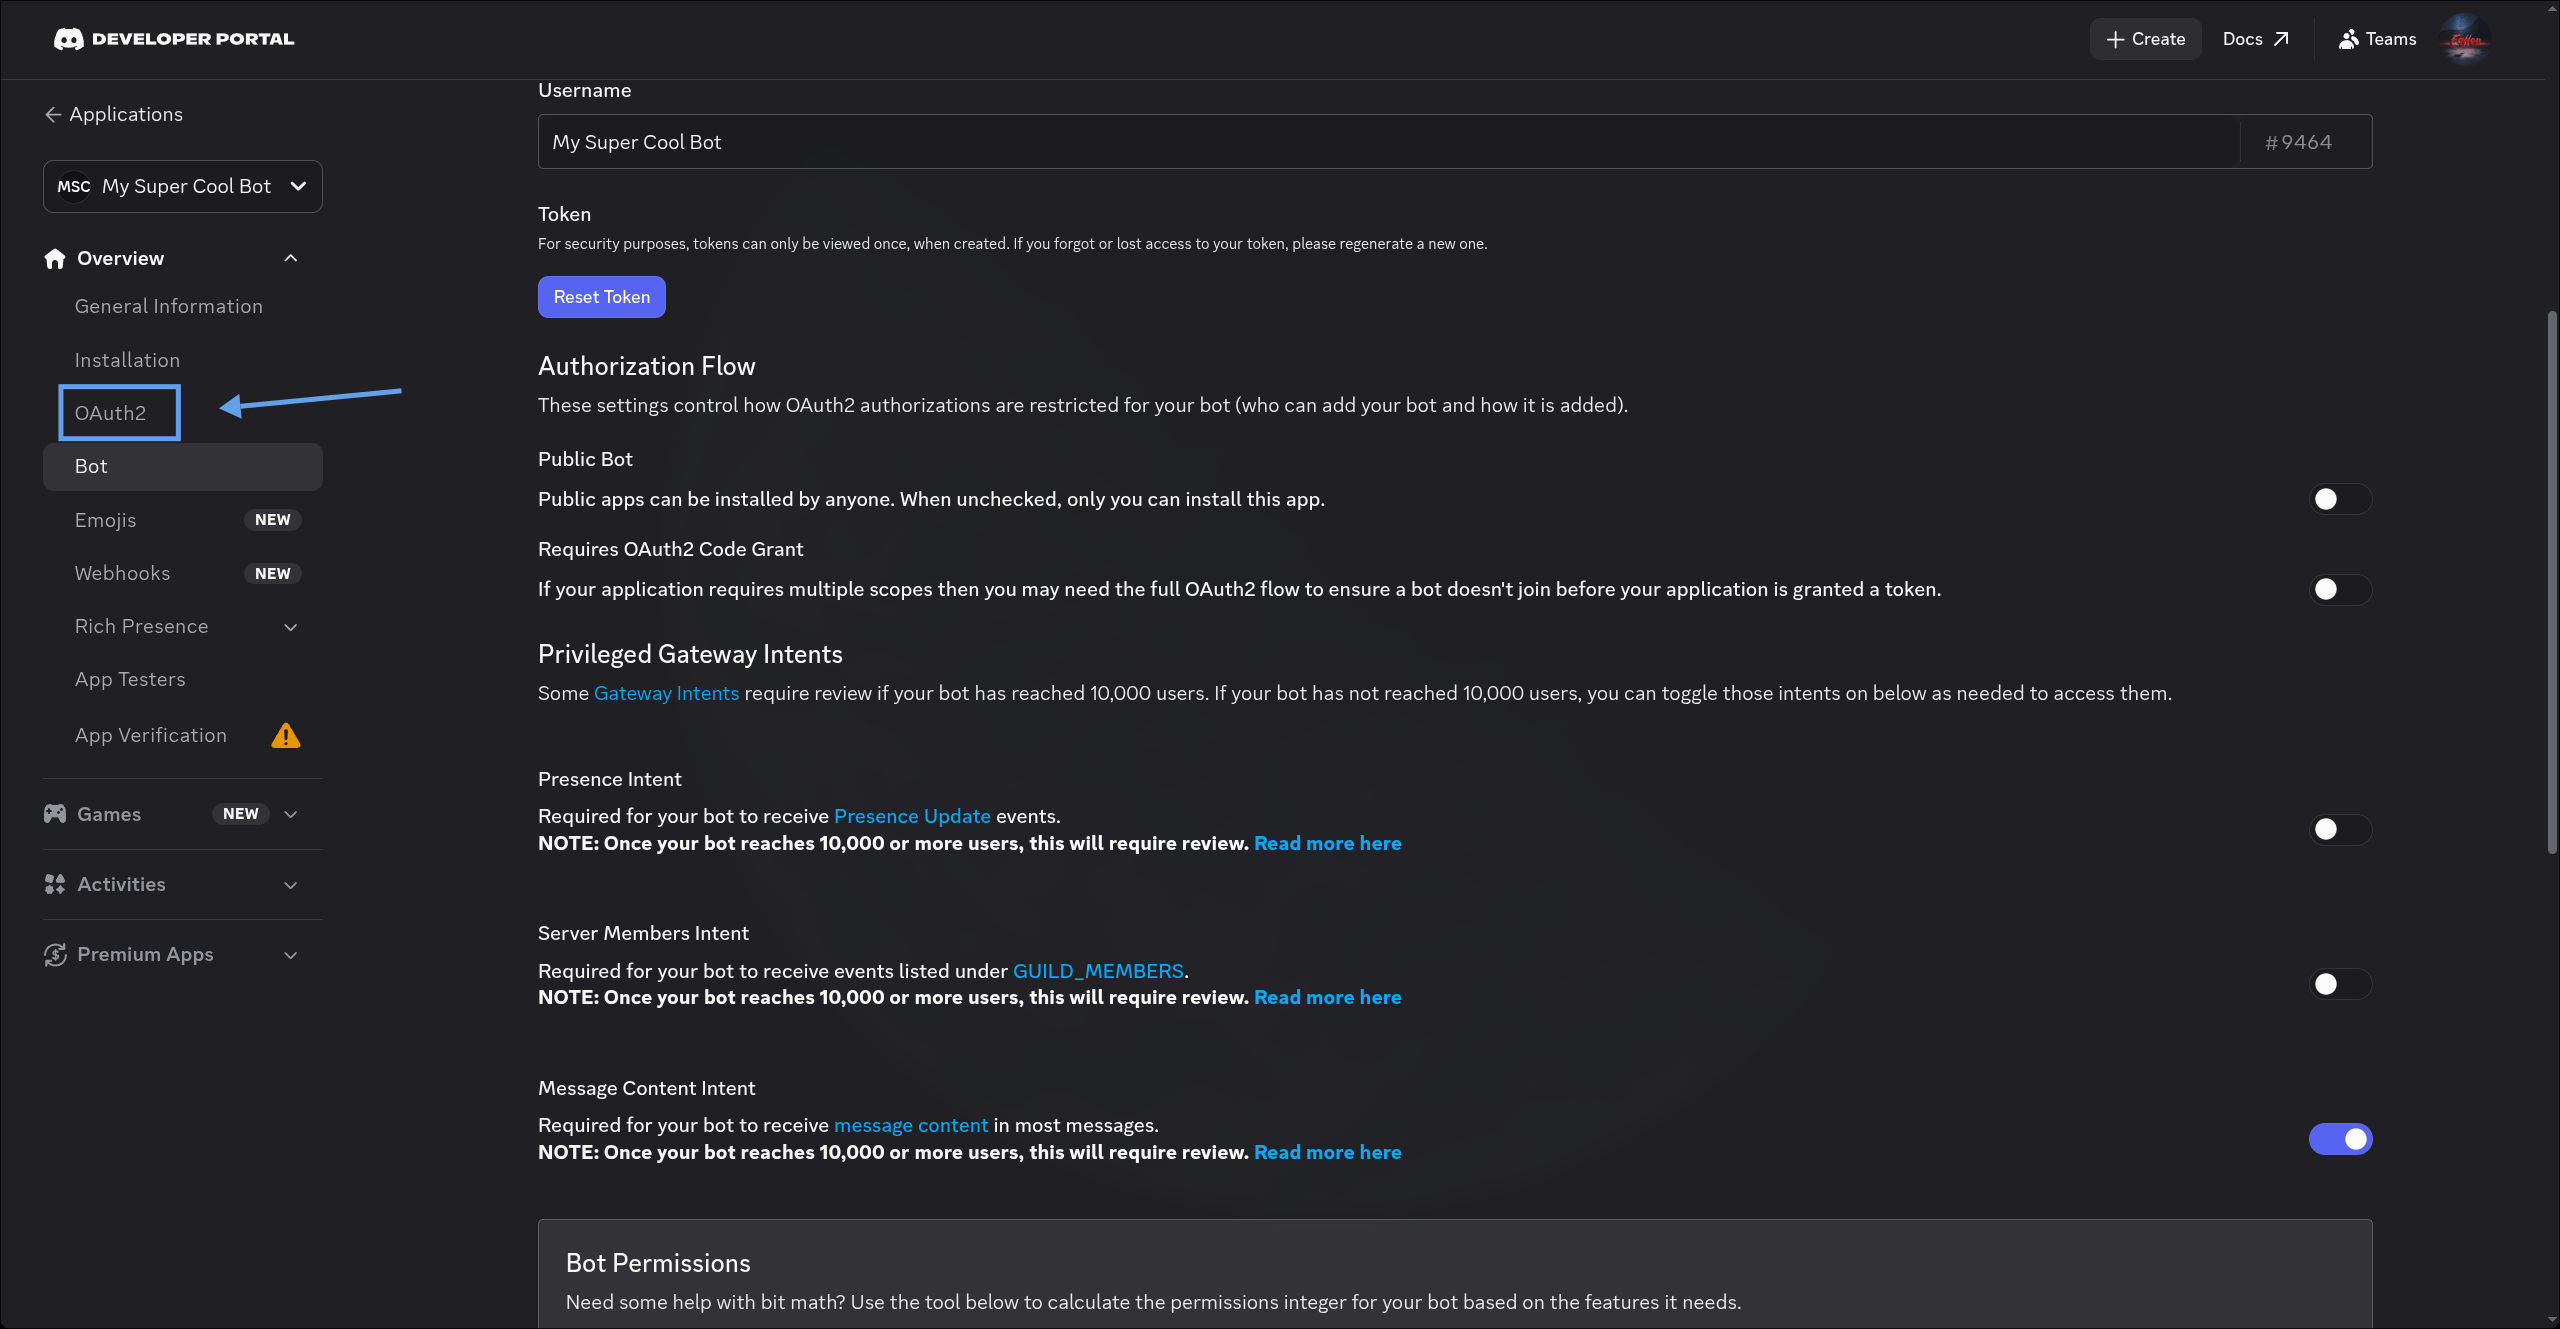
Select the "OAuth2" page on the sidebar to switch to the OAuth settings page.
Tap/click "Save Changes" at the bottom of the page after making changes.
Select the "OAuth2" page on the sidebar to switch to the OAuth settings page.
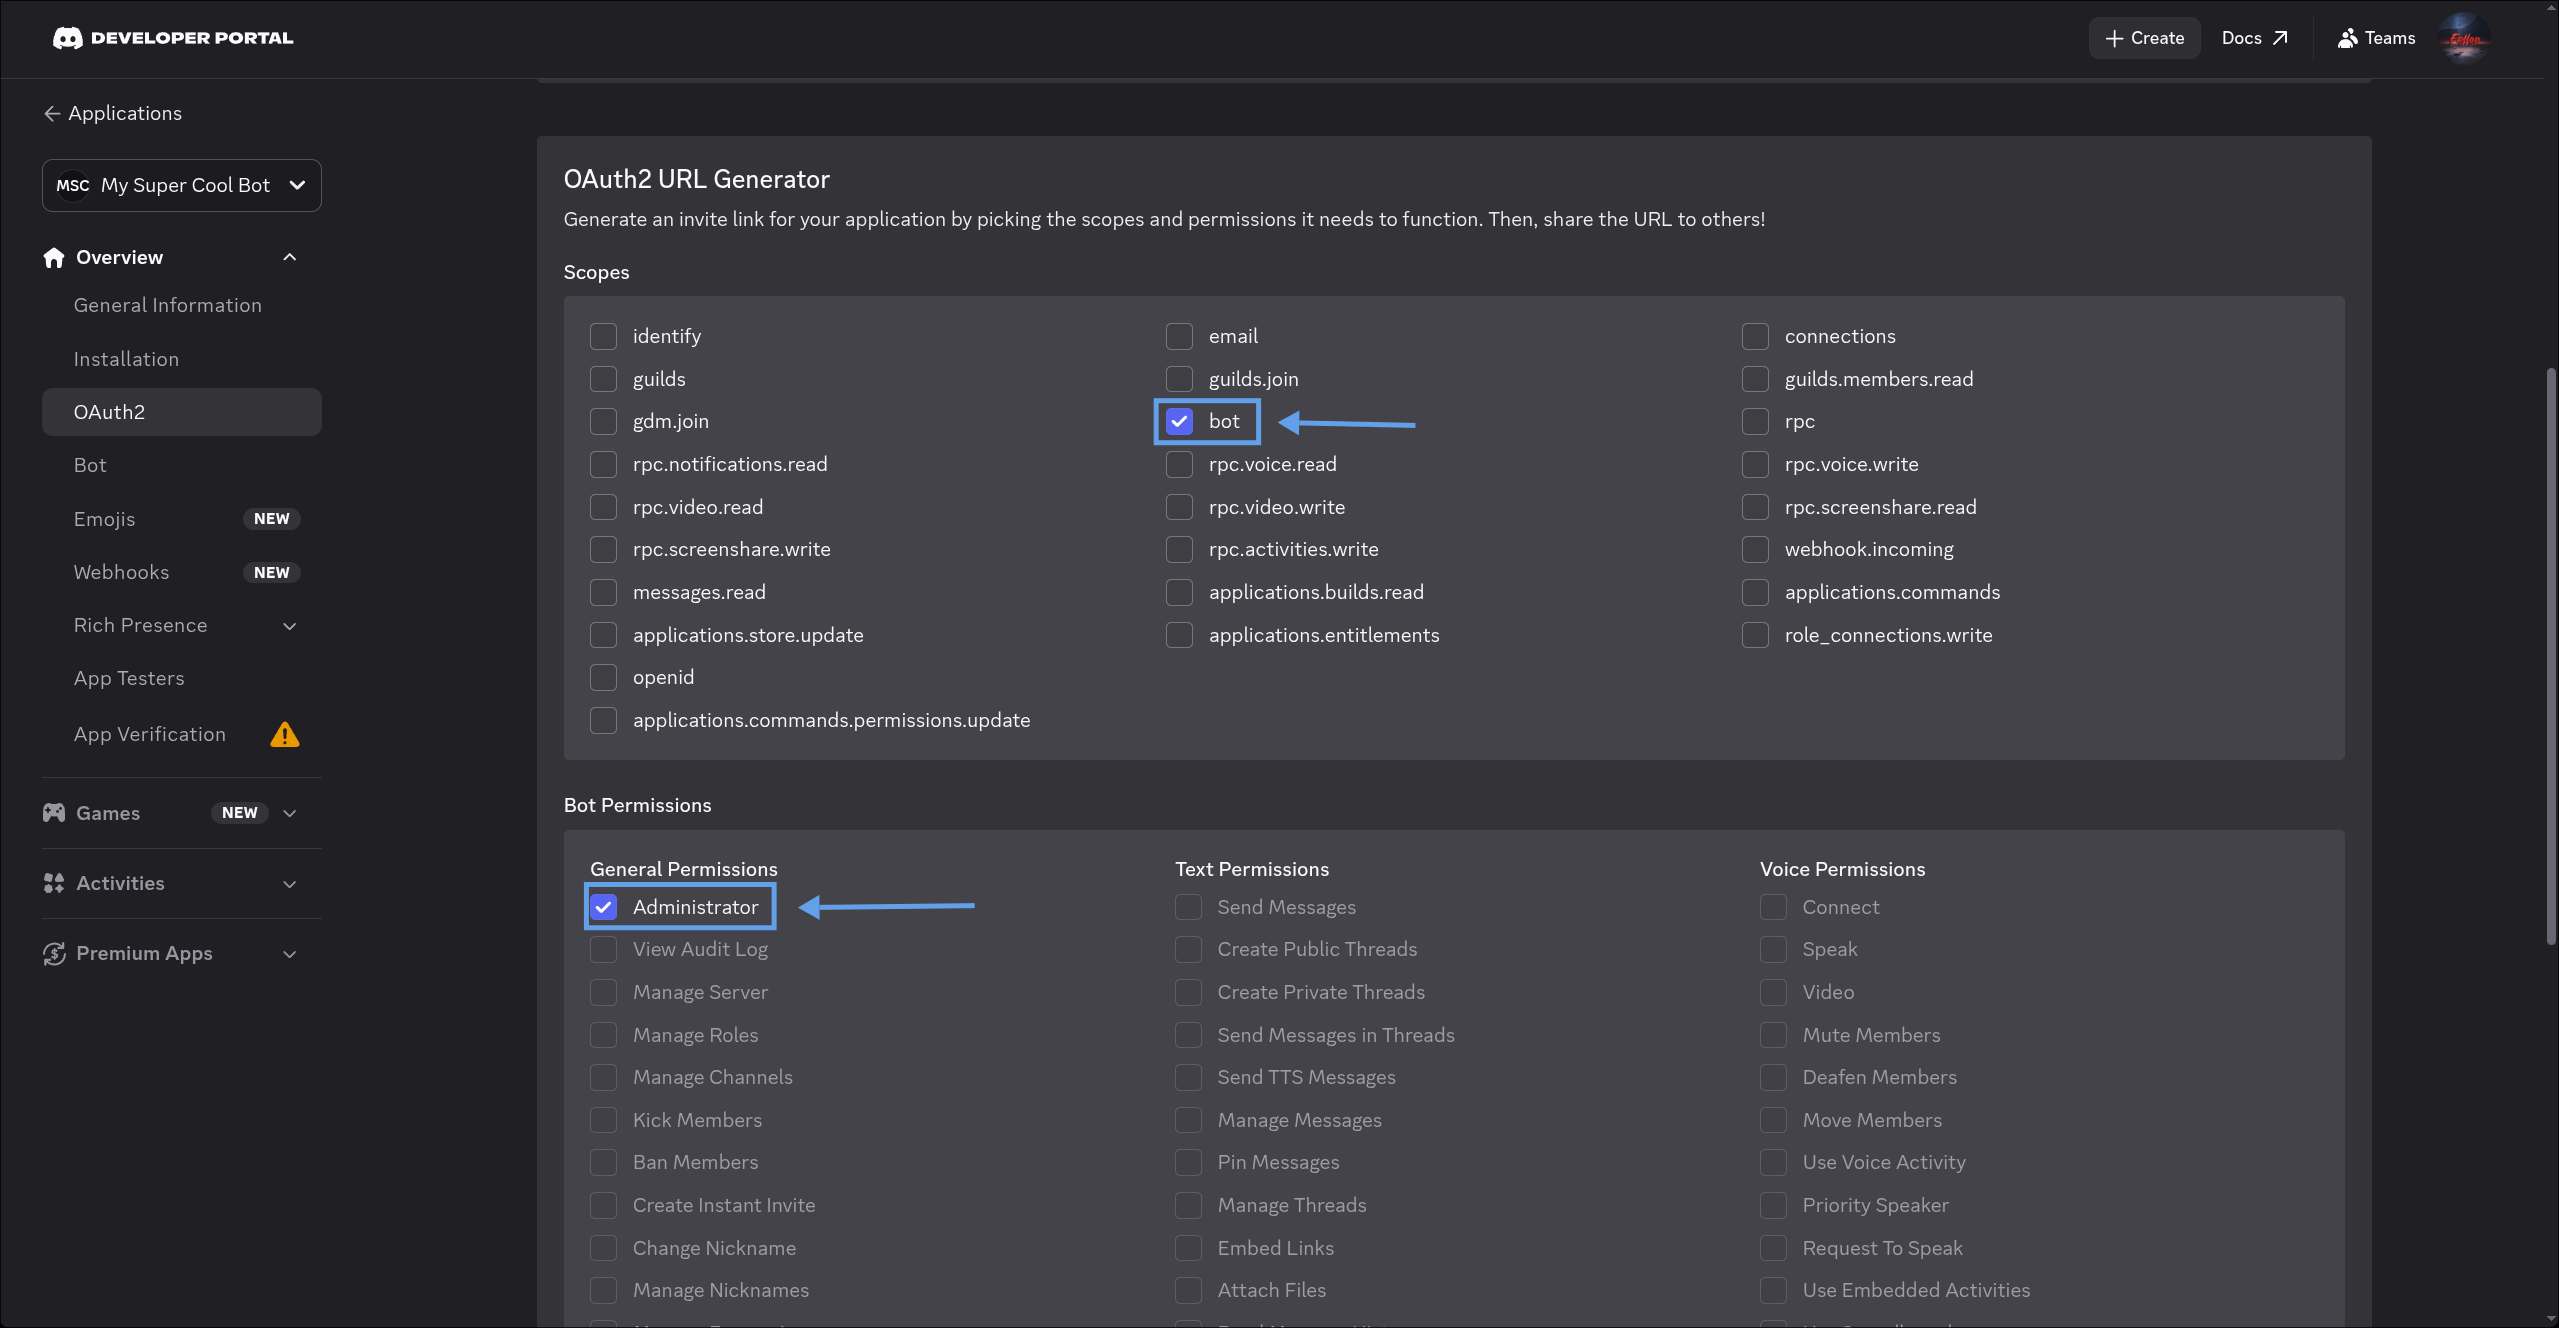
 Select the "bot" scope, then select the "Administrator" permission from the "Bot Permissions" panel that appears.
 Next, scroll down and tap/click the copy button on the right of the Generated URL.
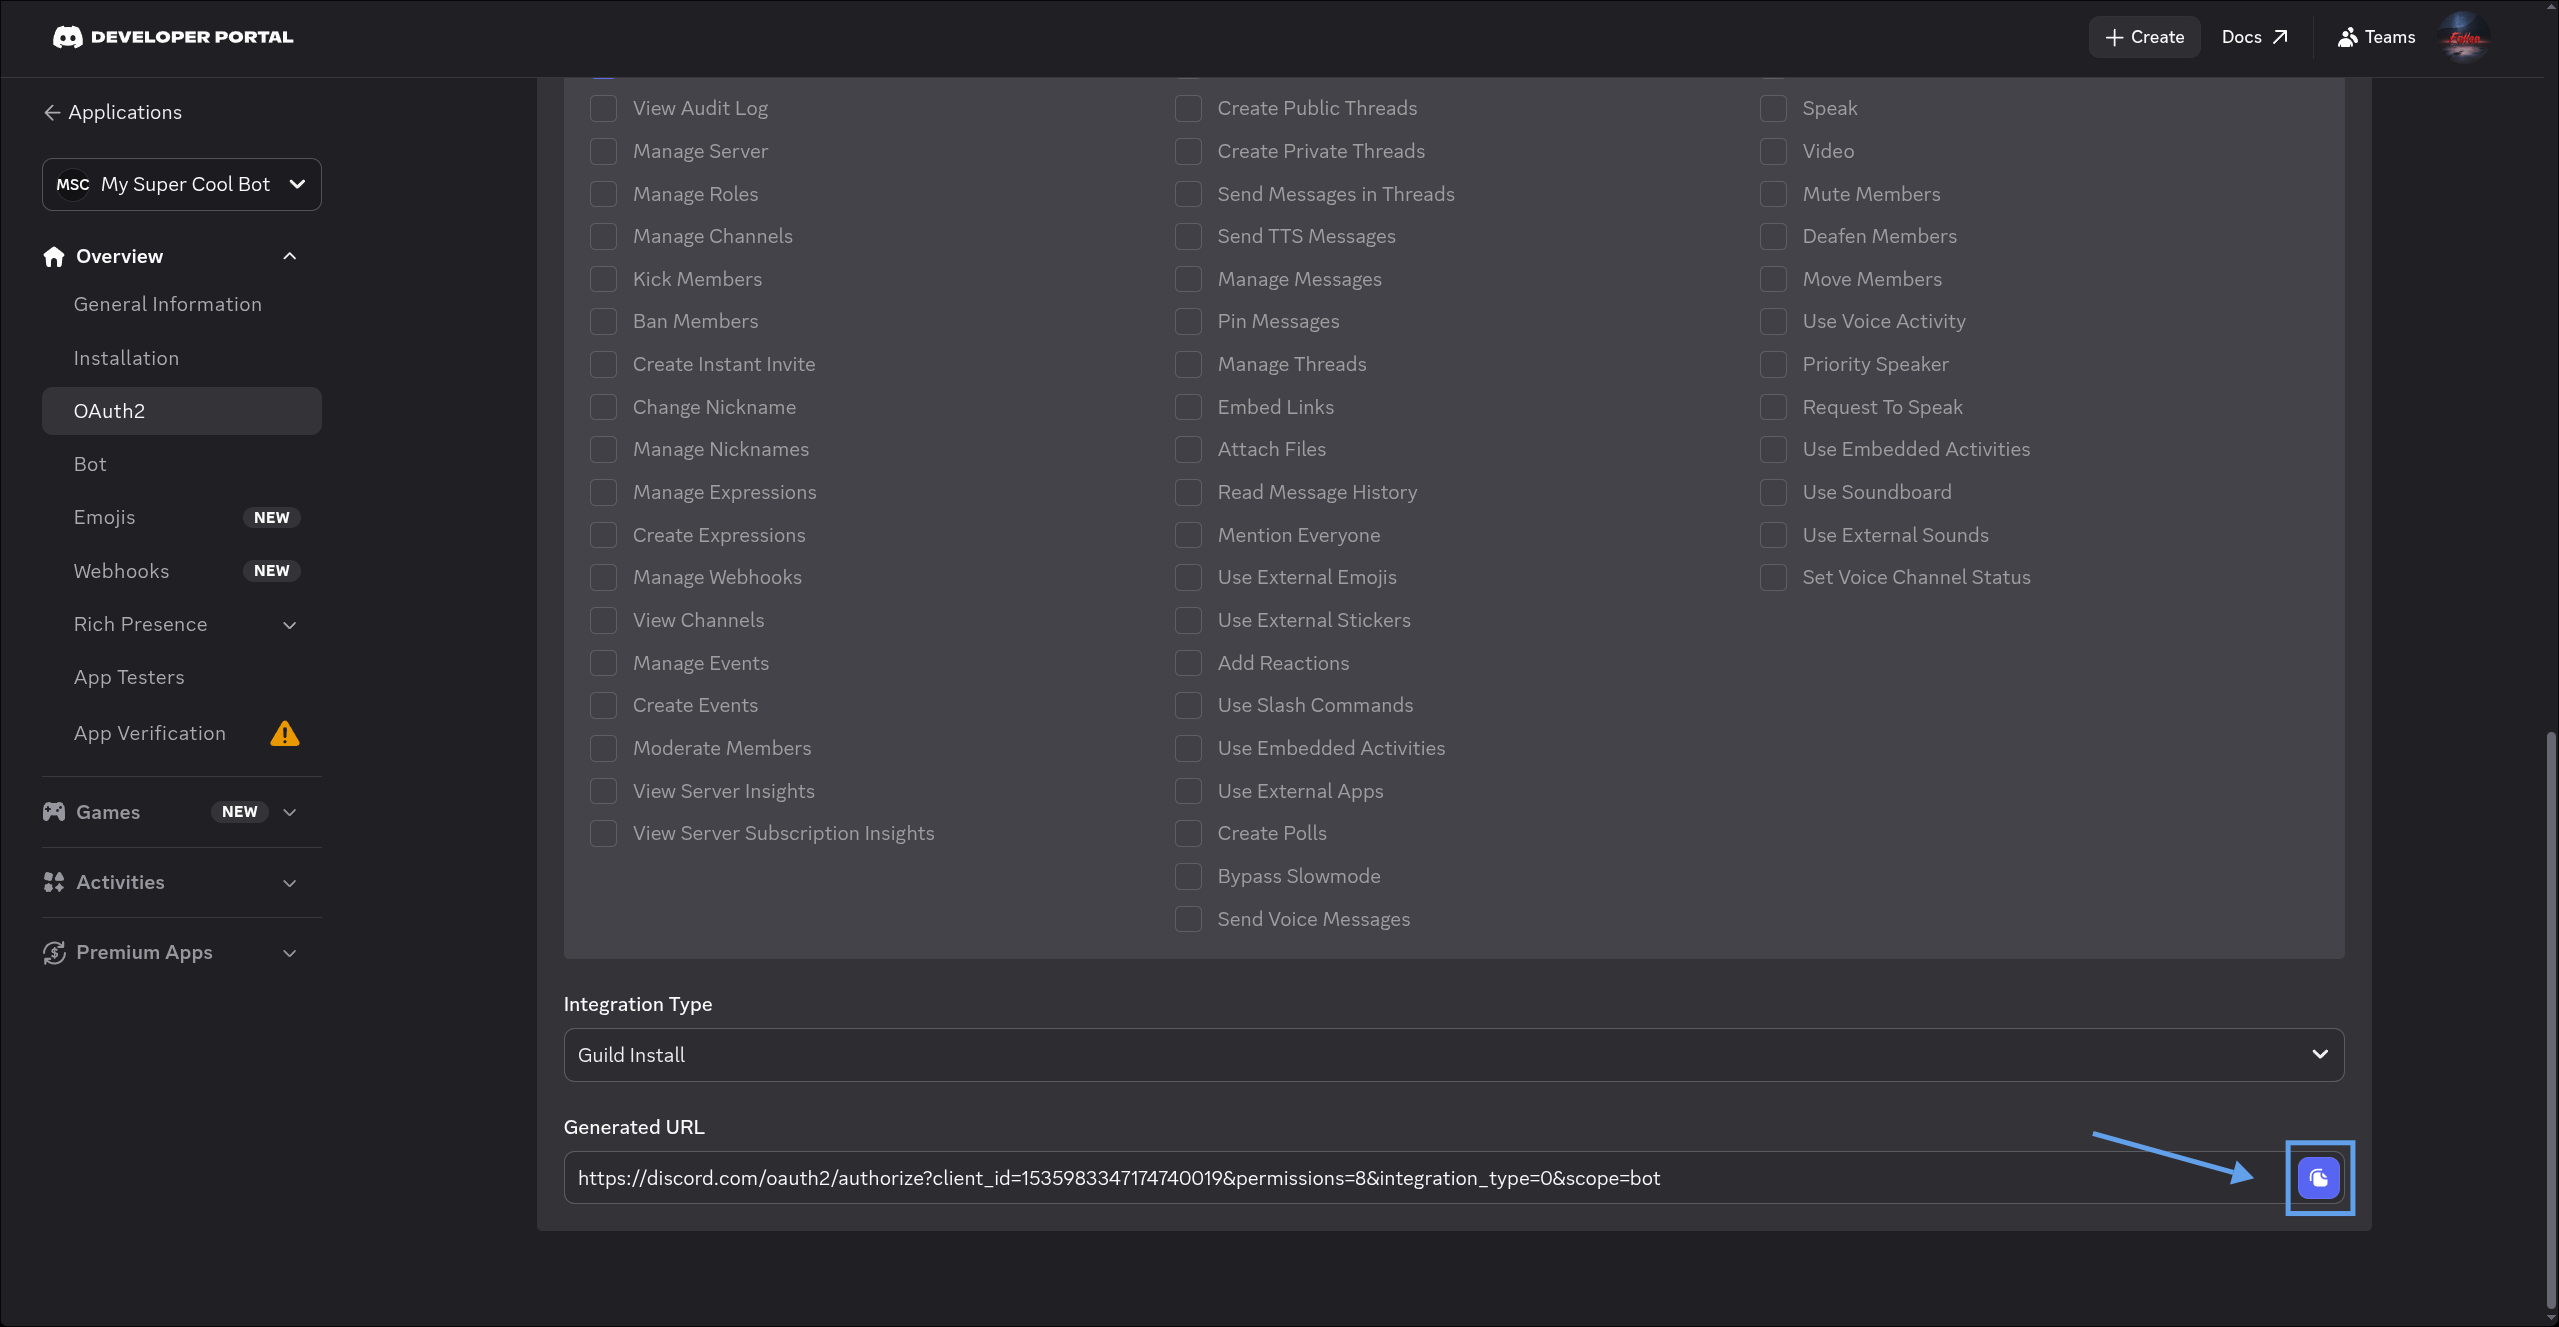 Finally, paste the copied URL into a new tab and follow the instructions to add the bot to your server.
Select the "Bot" page on the sidebar to switch back to the bot settings page.
Finally, paste the copied URL into a new tab and follow the instructions to add the bot to your server.
Select the "Bot" page on the sidebar to switch back to the bot settings page.
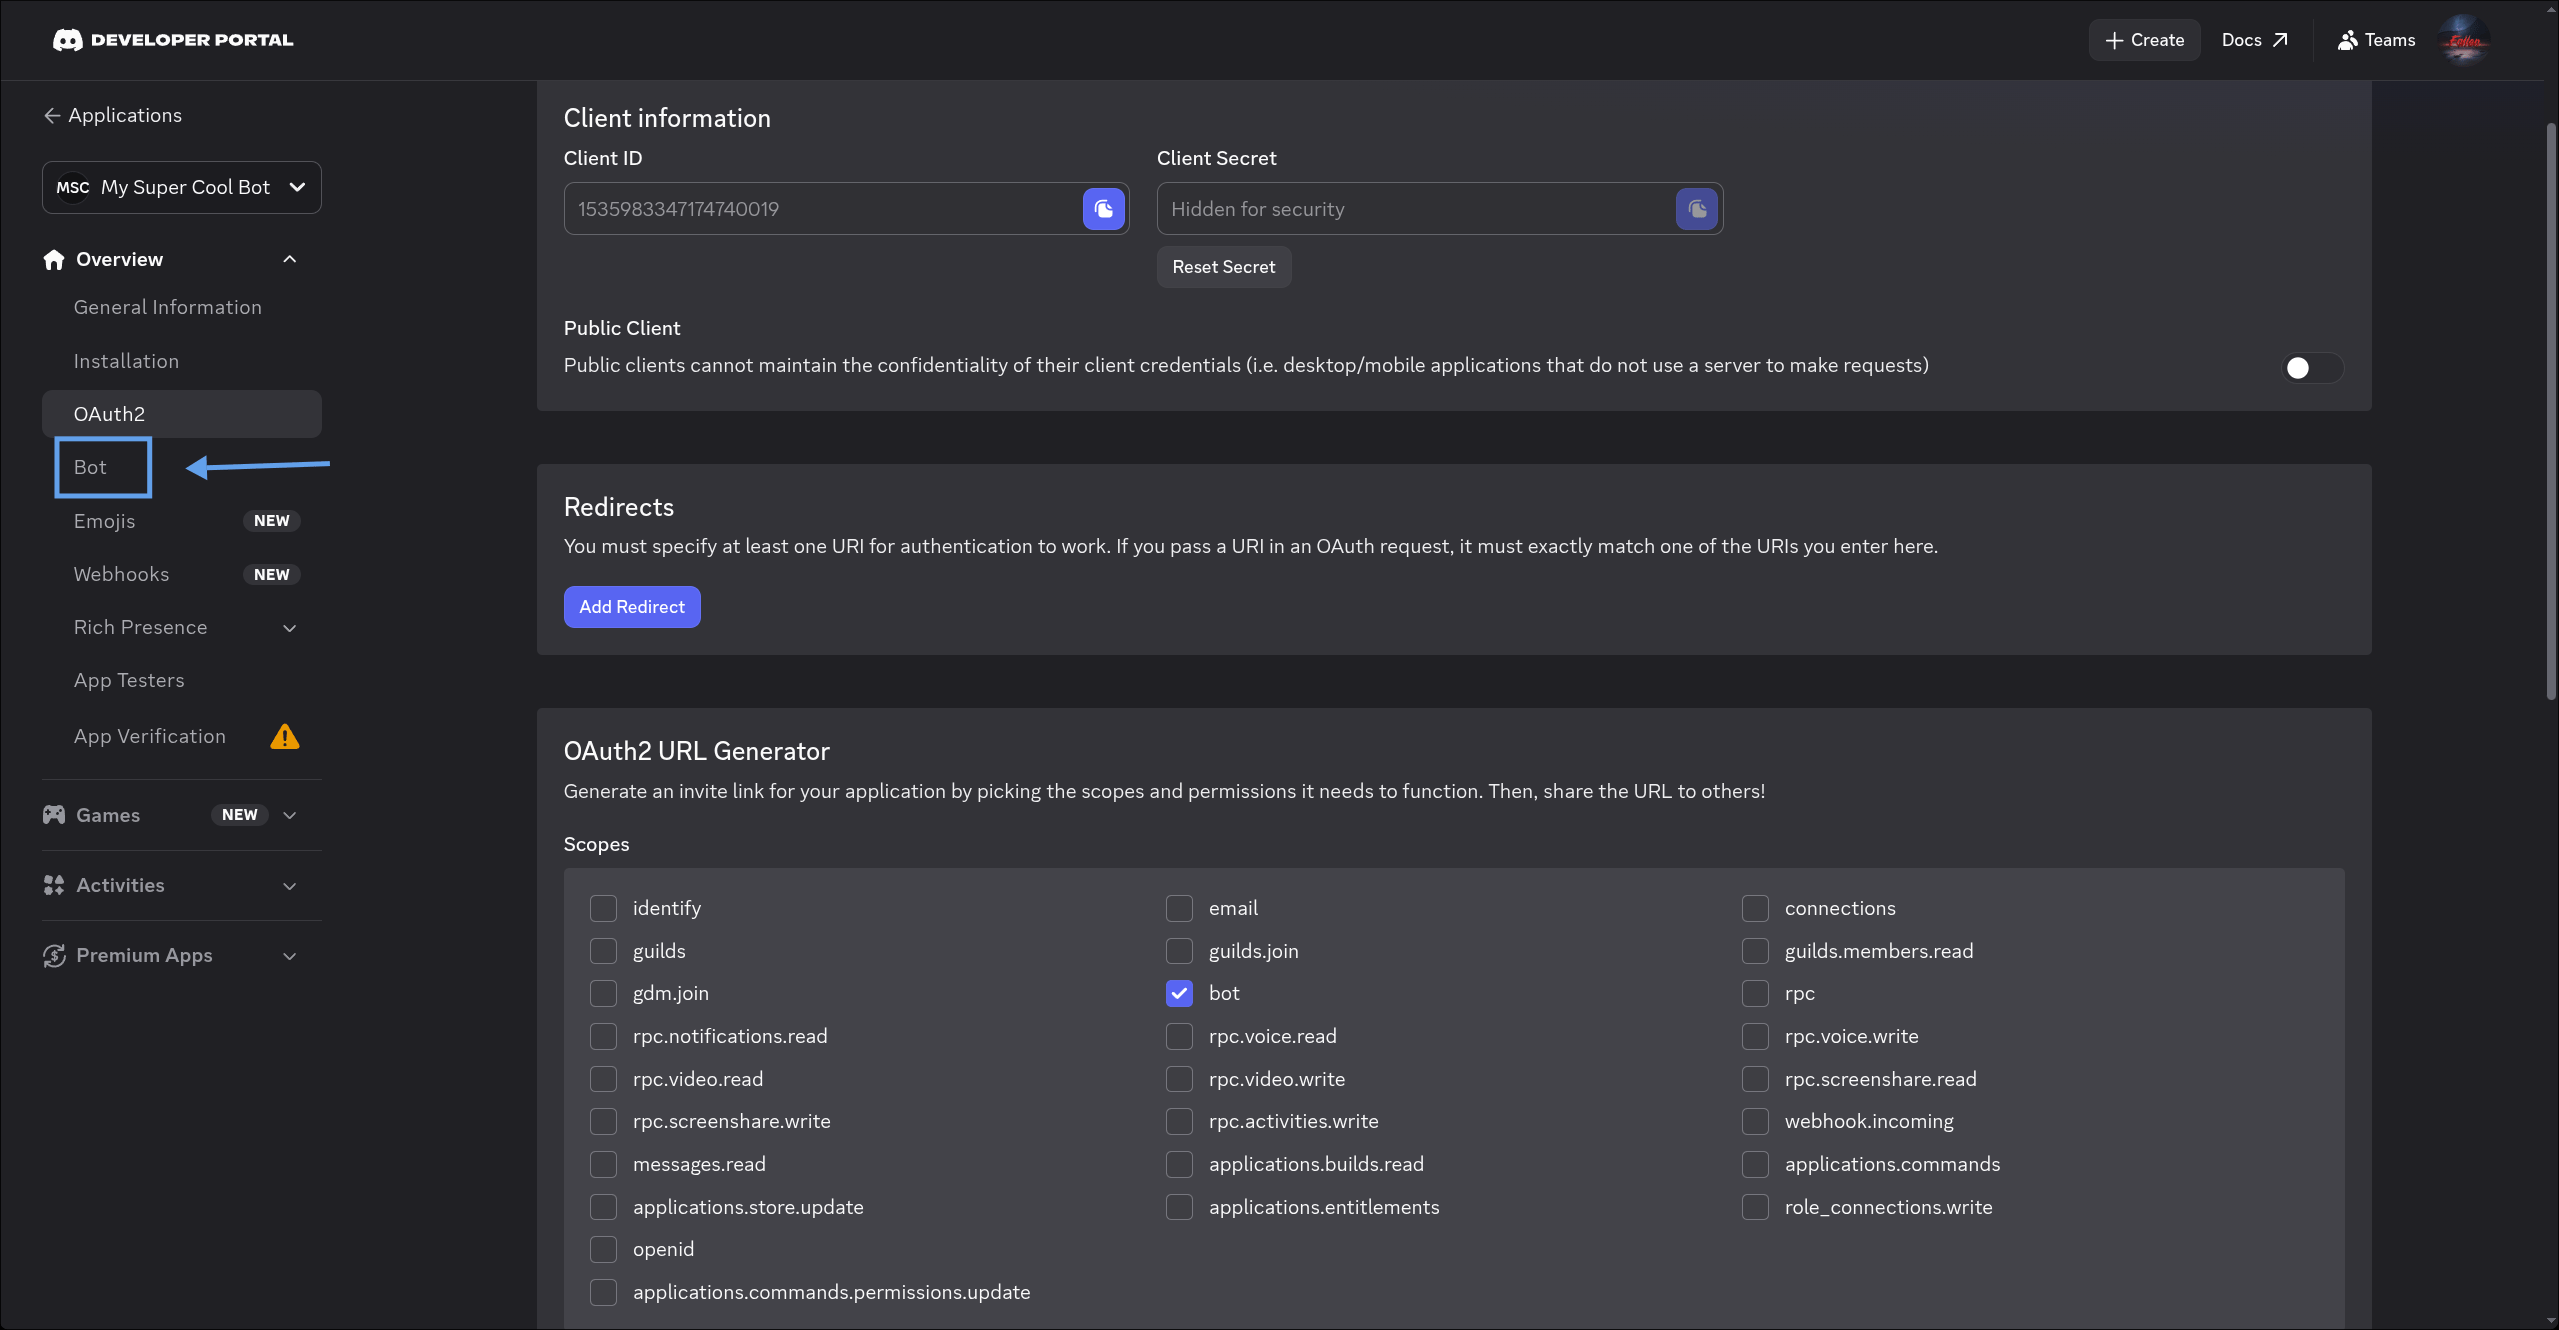 Tap/click "Reset Token" and complete any authentication prompts that popup.
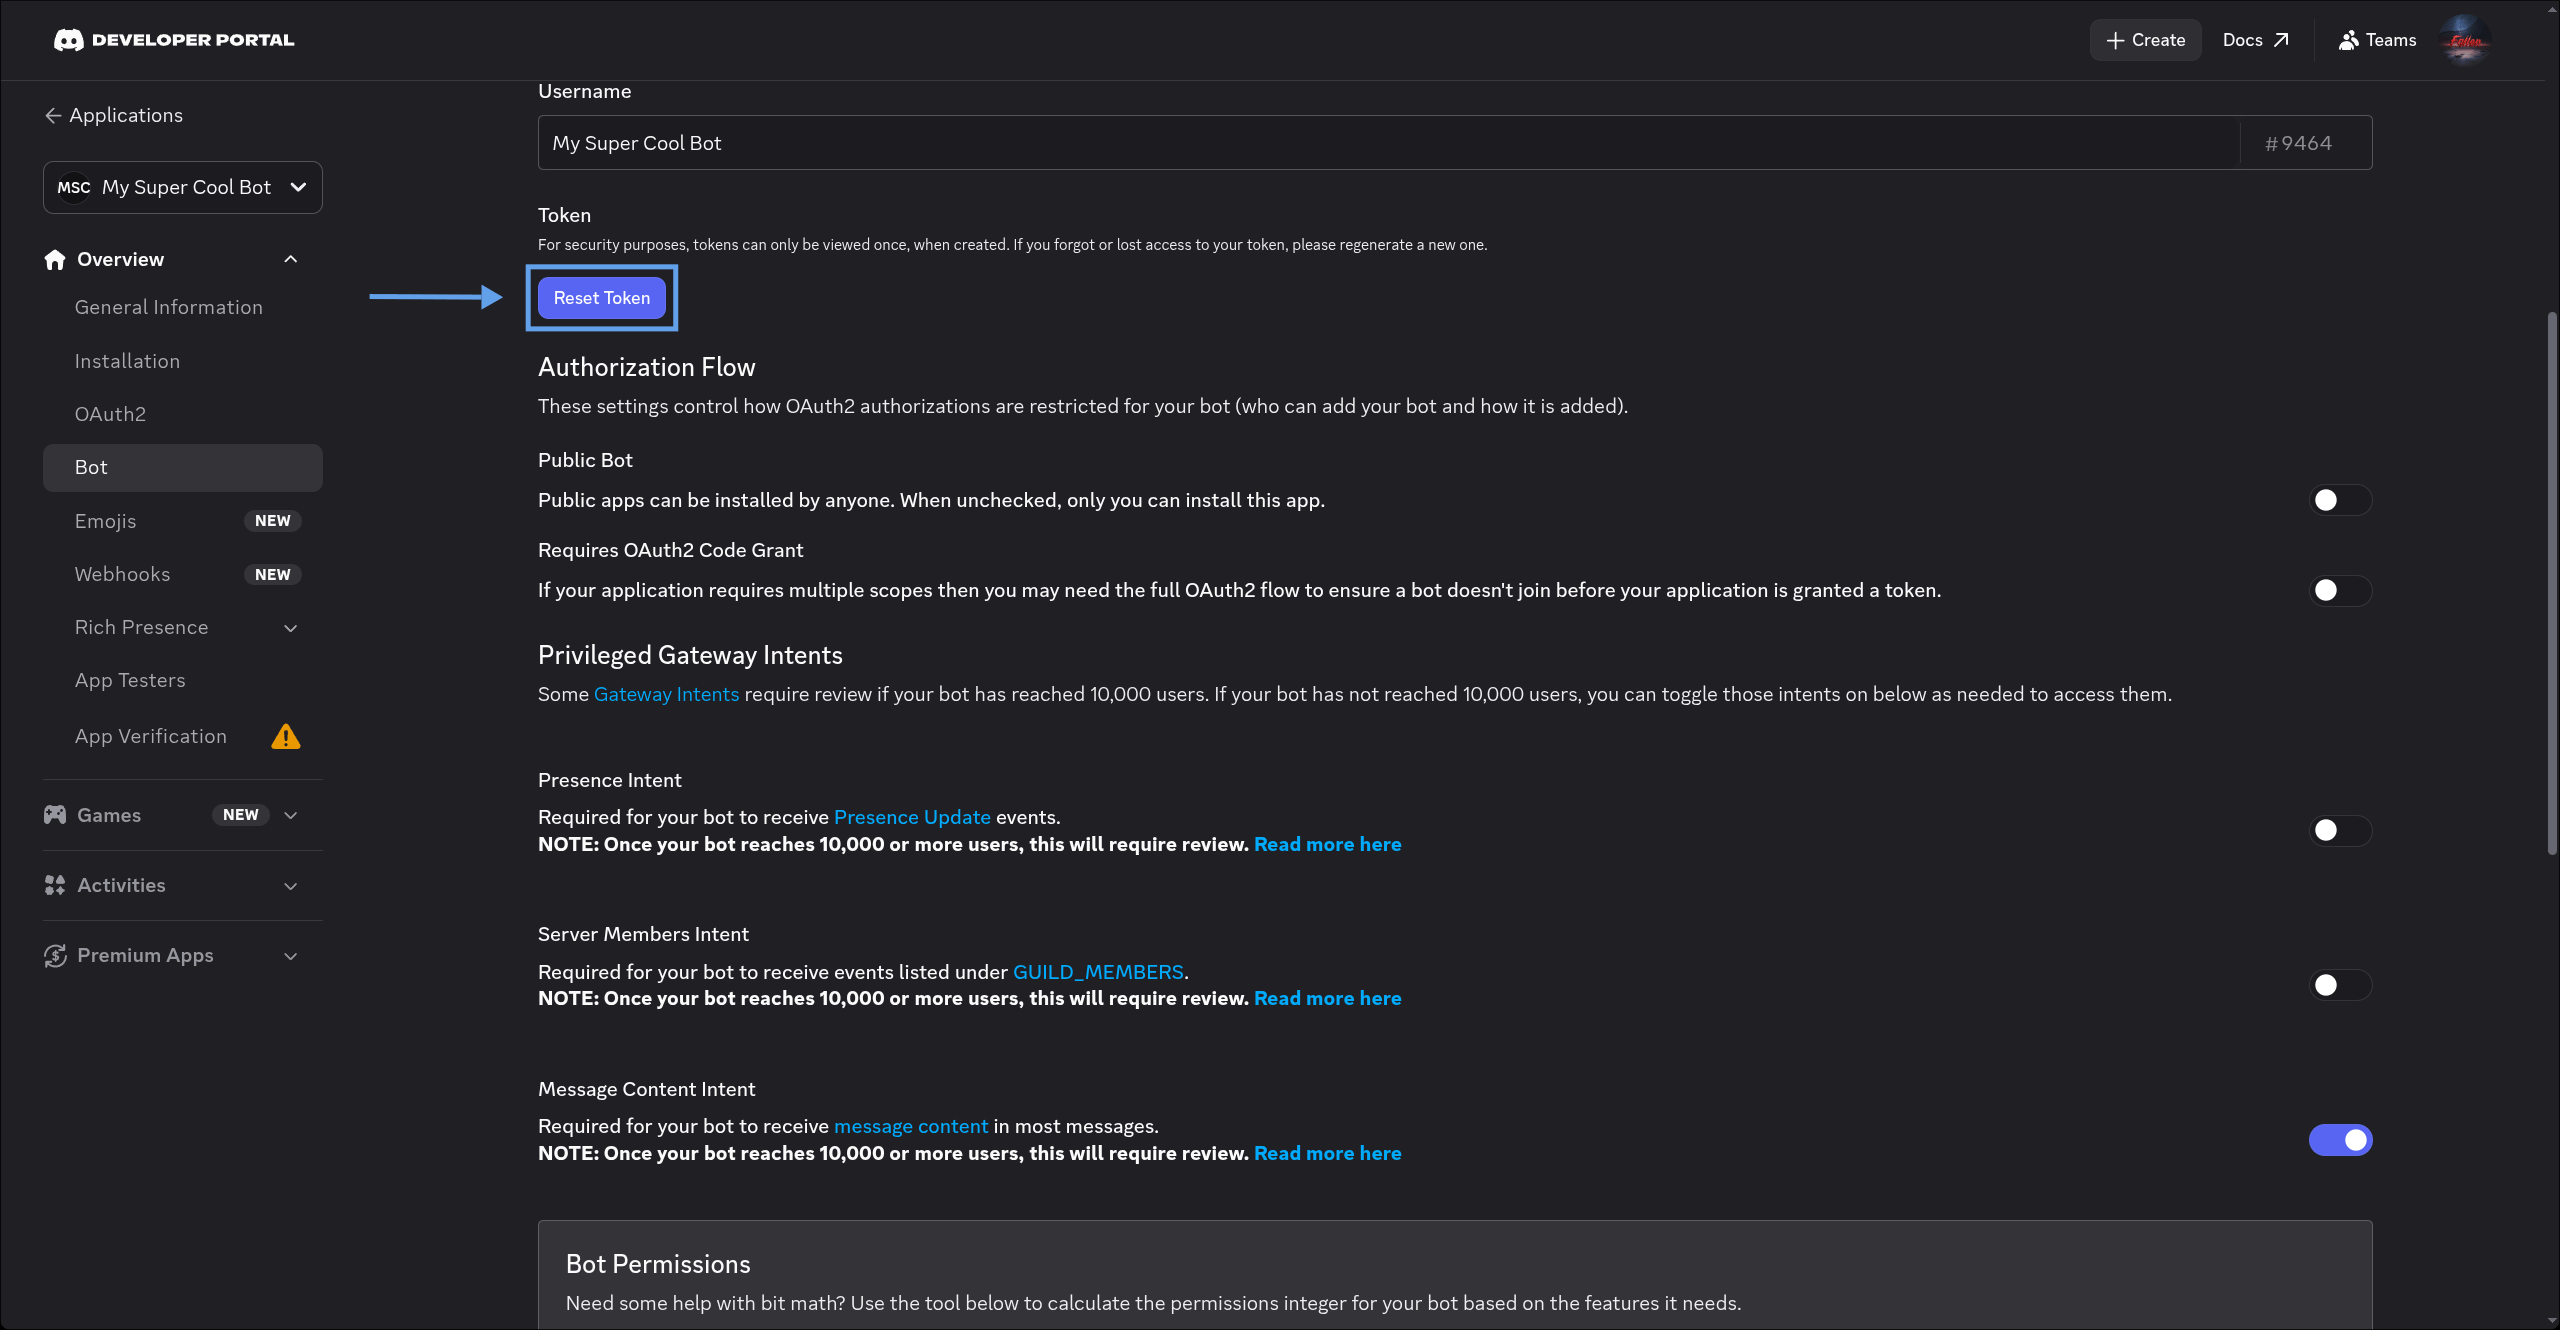 After resetting your token, tap/click "Copy".
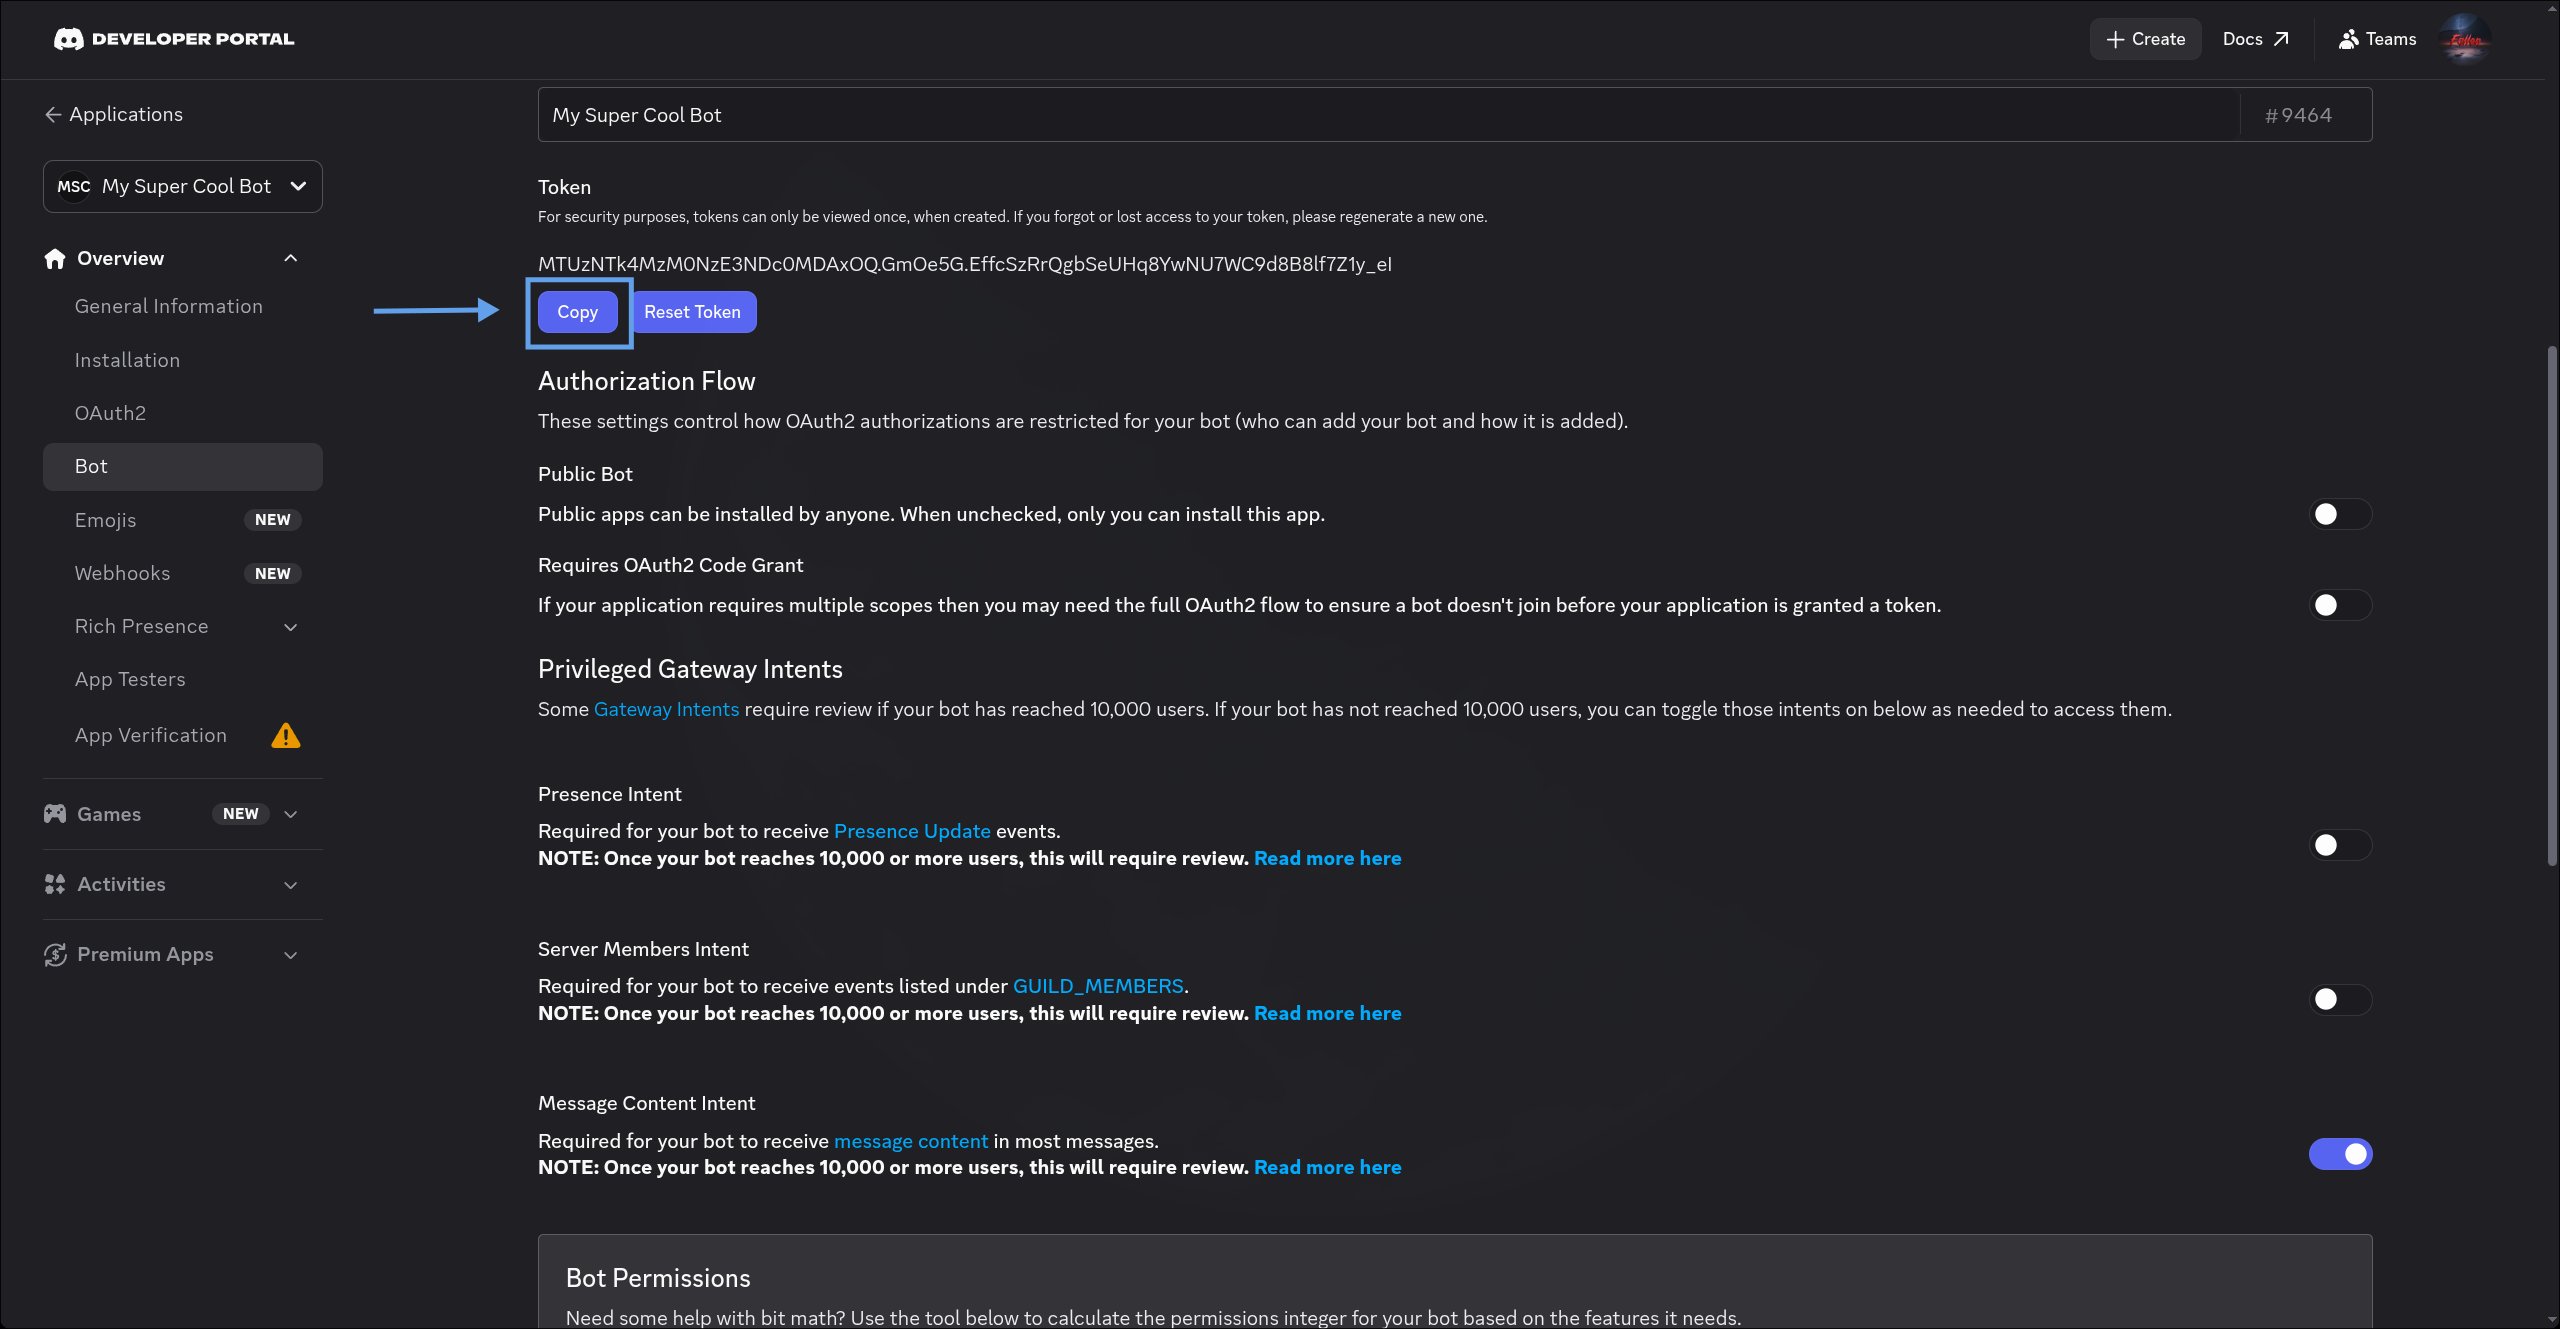 Then, switch back into Discord and use `/config proxy` in your server.
Select "Custom Bot" as the mode, and paste your token into the `bot-token` field.
Fyre will reply with further instructions to create a ticket in [Fyre Hub](https://discord.gg/SNxqD4ujTF) to complete your proxying setup.
Then, switch back into Discord and use `/config proxy` in your server.
Select "Custom Bot" as the mode, and paste your token into the `bot-token` field.
Fyre will reply with further instructions to create a ticket in [Fyre Hub](https://discord.gg/SNxqD4ujTF) to complete your proxying setup.